Visualizzazione post con etichetta etsy. Mostra tutti i post

martedì 7 marzo 2017

A Regency crossover gown

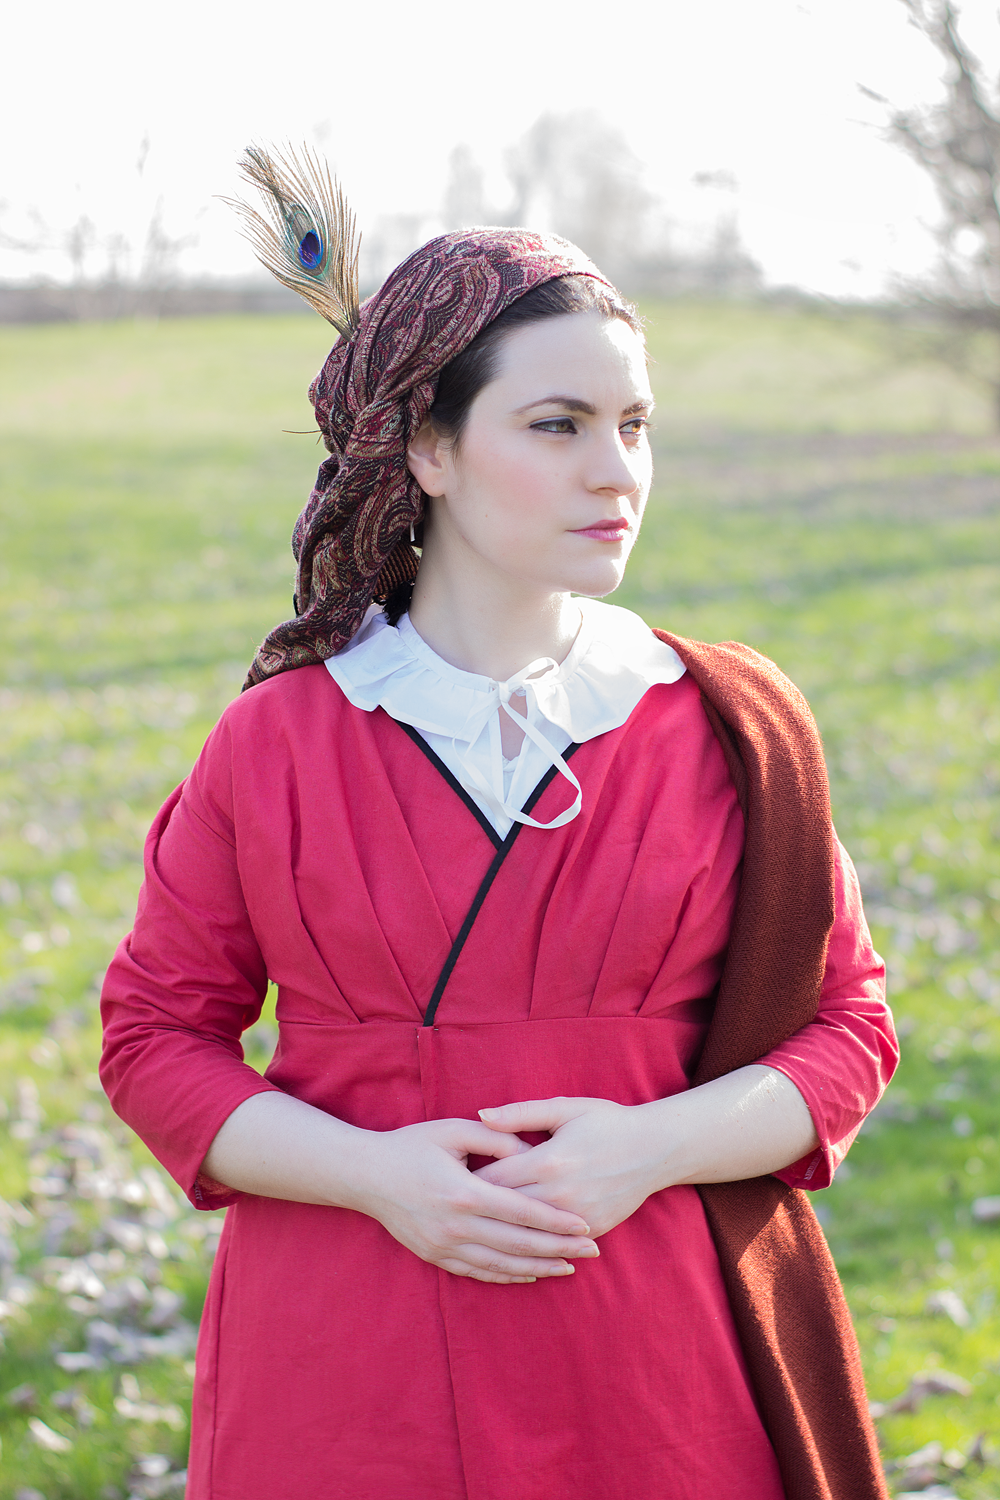
Last month I started to use the S&S patterns my bf gifted me at Christmas and with an incoming event approaching, I decided to make a new dress using some old Ikea fabric in my stash. I really liked the idea of a crossover/wrap gown, definitely different from my other drawstring dresses. I loved the fact to have a front opening dress with pleats at the front, definitely something eye-catching. So I went for "The Elegant Lady's closet" pattern.

Before proceeding with the post, I'd like to say something to beginners. The instructions for this pattern are not so simple as they seem. The bodice calls for a separate lining (not the easiest thing to understand for people not involved in historical costuming...), an extra skirt layer (the easiest addition), dropped shoulders with sleeves set in the back. Trust me, these are not so immediate steps for a beginner. I would recommend to avoid the separate lining and proceed with a basic one (so using the front pieces of the bodice as guide) and to do a mock up of the sleeves before cutting the final fabric. I basted, stitched, ripped  the sleeves various times before getting a clear idea of where they have to sit - especially for the seam. Where's the seam? At the side? At the back? At the front, as in 18th century? A mystery. I placed my seam on front but I'm really not happy. 
Mark everything when transferring the pattern onto the fabric and things should go easily. I also recommend to add the extra skirt layer on the front to avoid a gap while sitting or moving; you should obviously wearing a petticoat underneath but a white gap in a coloured dress (like mine) it's not so fashionable so why make economy for a extra yard of fabric only?
I also avoided the self fabric binding, binding the upper edges with black bias tape to create some contrast. I have seen something similar in a fashion plate of the time.
The skirts are put together using french seams, while the upper edges have been serged. Every hem and the binding is hand sewn. 

Despite these things, the pattern is really easy to put follow. At first I wanted to gather my front pieces but I realized it would have been really bulky so I followed the instructions making the pleats. Much better! My dress closes from left to right, I founded it easier being left-handed. It closes with a pin at the front but I will add some hooks and eyes for more support. 
The back fits tight so measure yourself carefully before cutting the fabric. Chemise, stays and petticoat add some cm to your measurements. 

I matched the dress with the brand new chemisette I made always from S&S and the outfit was so cute! Unfortunately we didn't took many photos during the event due to the bad light but we'll take new shots in two weeks when we'll be again in Stupinigi!
Some photos on the dress form directly from my Etsy shop:


domenica 26 febbraio 2017

18th century pocket hoops

Iconic and easy to make: I'm talking about the famous pocket hoops worn in 18th century!


Beginners or people not involved in historical costuming may find this term strange so let's give some explanation below: pocket hoops were structured undergarments worn in 18th century to support skirts and give volume at sides, as women's fashion of that time asked. They were boned to be supportive and flexible and could be used as small pockets too (as the name suggest); an opening hidden in the skirts allowed the hands to reach the hoops underneath.
Pocket hoops must not be confused with panniers, which were definitely bigger and worn during formal occasions like balls or court events. Pocket hoops were smaller and easier/lighter to wear. 

An example of extant panniers: 

Hoop petticoat or pannier, English, 1750-80. Plain-woven linen and cane, LACMA.


And pocket hoops:


The difference is really clear :)

Now, let's return to my pocket hoops. I drafted them using Norah Waugh pattern in "Corsets and Crinolines" book without big alterations; the beauty of pocket hoops is they don't need to be custom made because they're fitted to the waist with ribbons! Easy, uh? Mine are in cotton but linen can be used too; the only limited is your imagination, taste or stash! 

I boned them with reed for accuracy but also synthetic whalebone or steel boning are good materials to work with. These pocket hoops closes at waist with cotton tapes that run into a casing. 

Side slash opening - hand sewn.


Pocket hoops worn with petticoat 

They turned out really lovely and are a nice addition to my 18th century closet. My first pair of pocket hoops was awful (they were made from a Simplicity pattern...) and they didn't support the figure even if they were strongly boned and made of linen. 

This pair of pocket hoops is listed on my Etsy shop too, give it a visit! 

19th century cotton chemisette

Last Christmas I have been gifted (squee!) with a full series of Regency patterns created by Jeannie of Sense & Sensibility. I came across their website ages ago, when looking for Titanic tea gowns patterns. At that time I didn't sew yet (we're talking about more than 10 years ago!) so I didn't pay too much attention to the full series of patterns they offered but - recently -  I changed my perspective. Usually I try to draft most of my patterns to save money and assure me a great fit (I have a weird body shape with small bust and very wide hips so not every commercial pattern fits me) but since I sew mostly for others, I rarely have the time to drape a customized pattern for myself. So, yeah, sometimes I choose the easiest way using a premade pattern. 
My boyfriend made me the best present ever, purchasing for me a whole series of Regency patterns: this collection includes undergarments, several dresses, purses, embroidery patterns and spencers. Oh my god. You cannot imagine how happy I was, my hands were absolutely scratching while looking at the pattern pieces. I HAD to try them asap! However, I had a very difficult January fighting against a bad ribs inflammation so I couldn't sew or cutting without feeling huge pain: this situation translated in a temporary closed shop on Etsy and a period of relax. I felt kinda down (being self-employed if I don't work I don't get paid...) and during one of these afternoon I decided to challenge my pain sewing a very small piece from these patterns: a chemisette! 

The Regency undergarments pattern includes two chemisettes, one with ruffled collar and another one with a pointed collar. I decided to make the first one with a flat ruffle. I used some sheer cotton I had in my stash plus some satin ribbon to close it. That's all. I made it all by hand excluded the shoulder seams, made by machine with a french seams.


A general overview with the dress on.

The chemisette came together really quickly, it was extremely easy to put together and it took me just a couple of days to be finished. In a normal health status I would have finished it in a day. I decided to avoid buttons or pins so I left the two part of the chemisette open, because there's enough overlap on the front to keep it closed when worn. 

This item is available on my Etsy shop in different standard sizes!  


Post in evidenza

Edwardian skirt and blouse, circa 1900-1905

I've always been fascinated by the style of early Edwardian era, with those lightweight blouses, fabrics, delicate laces and floating s...