Visualizzazione post con etichetta directoire. Mostra tutti i post

sabato 4 maggio 2019

Making the Kyoto Costume Institute striped jacket pt.2 (1790s)

After two years I did it. The KCI striped jacket is finished! If you are an old follower of this blog you probably read part 1 of this process, concerning the first steps of patterning. Alas, I never managed to finish this jacket and the toile I made remained in my stash for a long time. I had everything - the fabric, the buttons, the pattern - but I didn't feel ready to work on it, probably because the fabric was no longer available for purchase and there was no room for error. 


But I'm so glad I waited. My body changed too much in two years and my skills improved. 
The first thing I made was to work again on the mock up, draping it on the dress form according to my new measures. The back was still perfect (just a little bit of room at sides) but the front was way too big. I ended up in taking approx 6 cm on both front pieces! I also had to alter sleeves lining, which were too roomy in biceps area. After this, I could start to work on the fashion fabric. 

The construction was really straightforward. I lined collar pieces with fashion fabric instead of using scalloped scissors (my cotton frayed too much), pressed them and basted; then I sewed lining and fabric together leaving a small gap at the back to turn everything right side out. Not a HA sewing technique but its gives a clean and fast finish, if you press it properly after. I made the same with the sleeves, basting cuffs to the fashion fabric and joining the fabric and lining at wrists. Armholes were then serged. Again, not HA but all my costumes have modern finish inside to last in time.  
Just some notes about the cuffs. They are not functional. There's no need to button them because they match perfectly my  wrists but buttons can be added as decoration; I decided to leave them off for now since the original garment doesn't have button in sleeves. 

Waiting for front collar pieces...


Then buttonholes. Again, like in the cuffs, just a row of buttons is functional. Sewing all the buttons took a while, they had to be sewn at a specific distance to look specular and the functional row deserved more attention since my figure is not perfectly symmetrical. 

The last step has been the decorative sash, made out of light blue cotton sateen I had in my stash from ages. Last but not least the wig. My hair are naturally curly but way too long to be styled, so after a long wait I decided to use a wig

And it was done! After the first complete fitting, I could look at my new creation with a more critical eye and noticed my hip pad is too big for a late 18th century figure. The jacket looks better if worn without skirt supports, allowing the multiple skirt layers to do their job. This means I have two make at least two new skirts to balance the absence of the hip pad (I cannot use the red one shown in photos since it would be too long at back...) which could be a good excuse to use some beautiful silk crepe I have purchased recently. Or muslin. Or cotton voile. Still have to decide. 


giovedì 18 aprile 2019

1790s robe en chemise and open robe

These two pieces have a long story. I made the robe en chemise in spring 2017 and the open robe at the very end of 2018 and could talk about them only now, April 2019. Two years after but it's worthy. Before we start, I'd like to make a short costume history lesson for those who don't know what a robe en chemise (and open robe) is. 


At the end of 18th century, fashion evolved. French Revolution and the discovery of the classical world influenced fashion of that time introducing a new idea of simplicity; gowns became less rich and trimmed, white muslin dresses began to spread following the famous chemise à la reine introduced by Marie Antoniette in the 1780s. There was no room for the elaborate trimmings of the previous decades, although sack dresses remained in use as court and very informal wear. The trend started with the Queen of France and simpler models like robes à l'anglaise lead fashion to what we call robes en chemise and open robes.
A robe en chemise is basically a fitted version of the previous chemise à la reine, which is more voluminous especially in sleeves; chemises of the 90s featured quite fitted sleeves, shaped at the elbow and often open at wrist to be closed with buttons. 3/4 sleeves were still in fashion but long sleeves become more common if compared to only 20 years before. Robes en chemise were fitted to the body often with a fitted lining in the bodice and then drawstrings at neckline and waistline as their earlier counterparts. They were made in muslin, cottons, silks, often worn with contrasting petticoats underneath. 
A open robe was worn over a chemise dress and crossed under the bust. Waistline began to rise in the 90s, introducing the later Empire line we all know. Corsets were still worn but began to be discarded after 1795. Open robes can have sleeves or not, could be trained or untrained, and could be made in lighter fabrics like cotton or silk as well in multiple colours (I have seen them in red, black, purple, blue, with or without embroidery... the web is full of resources!). 


Now that we all know what we're talking about, I can introduce my dress. As I told before, the robe en chemise was made in 2017 altering  a pattern I already have and was kinda plain, without trimmings; I originally planned to make a red open robe to go with it but never had the time to start it (the red fabric for that became later my 1770s jacket and skirt...). You can read about this two projects here for the open robe and here for the robe en chemise, which is actually divided into 3 parts. 

So at the end of 2018 I needed a comfy dress for my journey in Villa Saraceno (Italy). I needed something simple to move around the house without feeling restricted into a corset or big undergarments. So I took my old robe en chemise and restyled it. I made the back more fitted, moved neckline drawstring at front and trimming it with lot of beautiful net lace. 


Once it was done, it was time to drape the open robe lining. I used the pattern by Janet Arnold with some alterations. I only used the lining pieces to make it. It run big in the back so had to remove some cm here and there. The fronts were a little bit longer but nothing that couldn't be fixed. The skirt was very easy to make, just a huge rectangle with a train. The front edges are all hand sewn. 


The dress and robe were ready for Villa Saraceno but I never had the chance to shoot them properly until some days ago. I'm so glad I waited because now I can show you my improved outfit: yes, I have a wig! I have very long hair, naturally curly, but not that curly to make 1790s hairstyles. They are long, heavy, parted in the middle, perfect for Victorian stuff but nothing else. So, in pure Georgian style, I put a wig on my head to complete the look. You can spot some of my natural hair here and there, I still have to understand how to hide them all under the wig. 


And the robe en chemise without the open robe:


That's all for now! I'm going to make another one in a totally different colour and style using a special fabric. I won't tell you more until it has not started :) Both dress and open robe can be ordered on my Etsy shop, the open robe comes to you custom made! 


domenica 16 aprile 2017

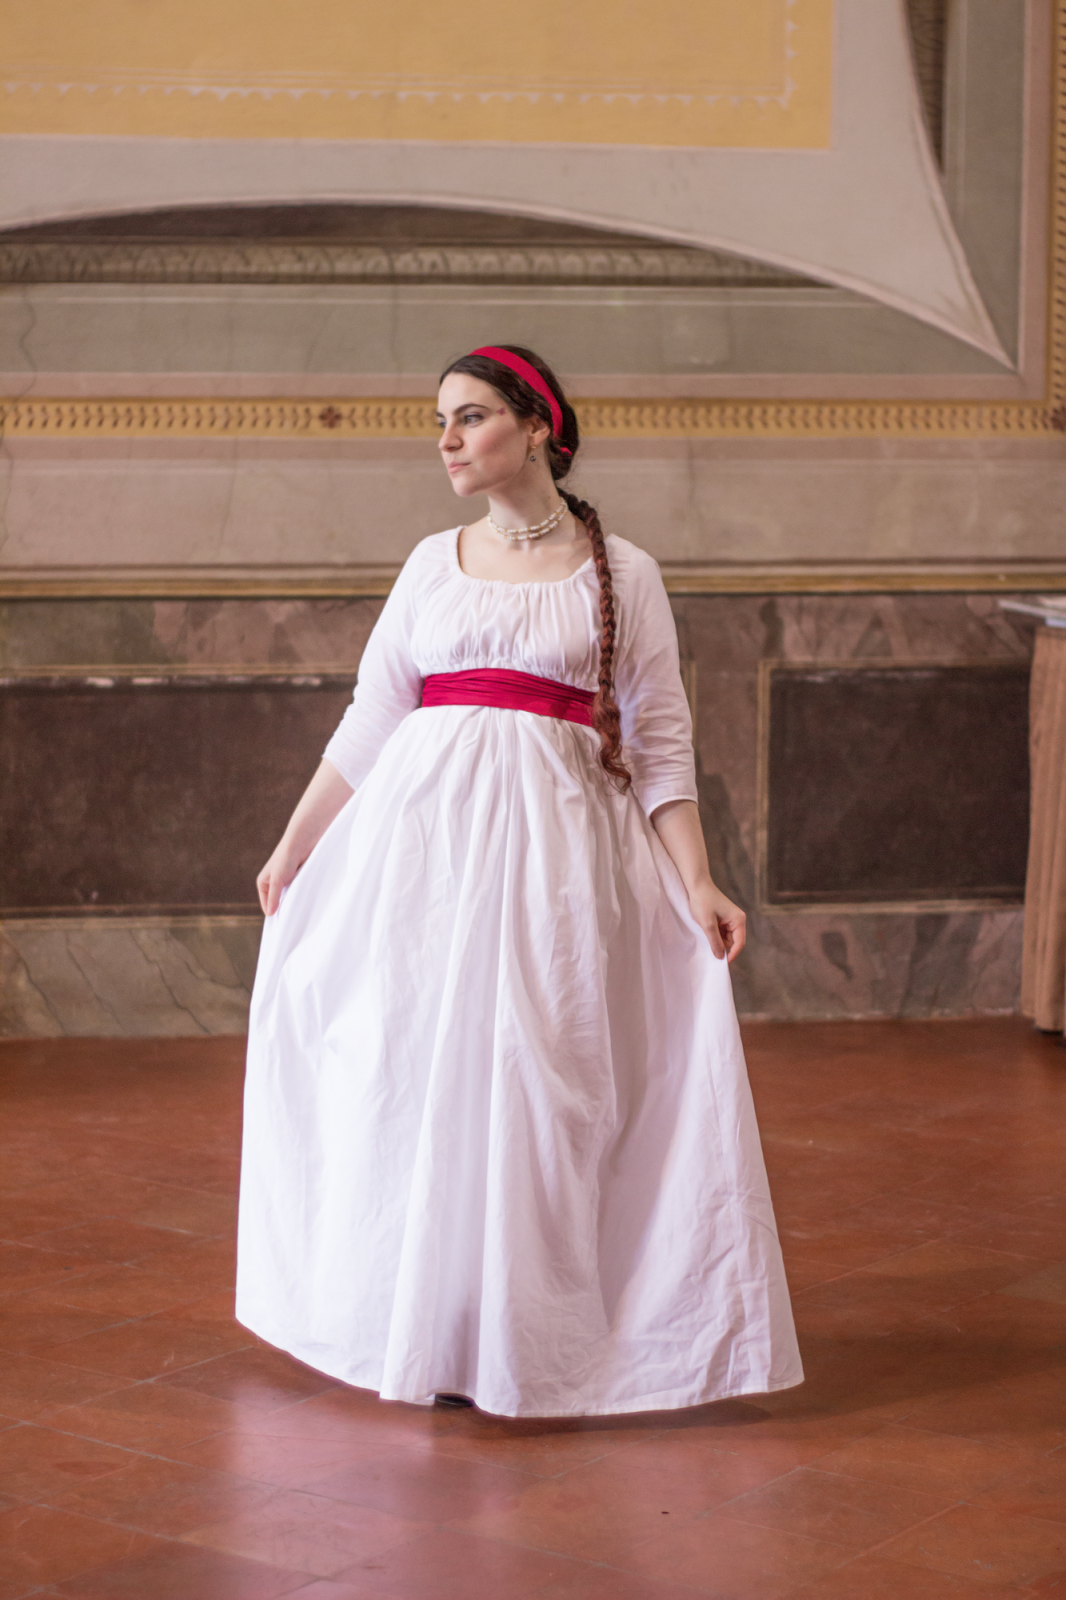
White cotton Directoire dress (1795-1799) part 3: finished and worn!

And here we are with the last part of the process, the dress finished and worn. We had a rainy Sunday and we couldn't take better photos but a couple turned out lovely. 

Some words about the finished dress: despite taking accurate measurements, there's a huge gap at the back so excuse me if I didn't take so much photos of the back view. I was wearing accurate underwear (chemise, stays and fichu) but I felt ridiculous. I know it's accurate (drawstring dresses were often borrowed because they could be easily altered to fit different bodies) and no skin is shown, but I have to fix this issue as soon as possible; for the event I relied on my long hair to hide the gap. 

The sleeves are really comfy and so the bodice. Sense and Sensibility pattern worked great for this project! The alterations were minimal but if you're planning to use it for a similar dress I strongly recommend to choose a bigger size (the bigger, the merrier! More gathers!) 

The sash and the hair band are made of burgundy cotton sateen. I'm planning a matching open robe for the next event which will be about fashion and will cover a huge period (1750 until 1825). 

And the photos, at last!


Some shots directly from the event: 


...and a video with the dress in action! 


The beautiful pearl necklace I'm wearing is by Fantasia Trinkets. It's a great addition to most of my historical costumes! Despite the issue with the gap in the back, I'm kinda pleased with this costume. It was fun and easy to make and the thick cotton makes it look more accurate. I also forgot to mention the outer finishing is all hand sewn and the drawstring channels are hand sewn with double thread.

And now, heading to the next project!


domenica 2 aprile 2017

White cotton Directoire dress (1795-1799) part 2

Here we go with the second part of this project. I don't have lot to say about, the project was really simple and quick to be put together (less then a week).
So, after pinning the dress on the dress form to check the fitting I started to construct it. I should have done a bigger size, I admit. There's a nice gap on the back but I'll wear my underwear so...I don't care too much. The bodice could have been more full and gathered, I'll add extra cm next time.

These are the construction steps:

1. I serged the skirt, sleeves and bodice pieces individually. It's not accurate but I need my costumes to last for years and this dress will have an intense use.

2. I assembled the bodice and made a drawstring channel with white bias tape.

3. I attached the sleeves (they're so lovely!) with two small pleats at the back.

4. I opened a slash in the skirt back and made a placket. I love this technique so much!


5. I run some gathering stitches in the upper part on the skirt. I wanted the skirt almost flat and the the back really full and I did it!


6. I stitched the skirt to the bodice and I hand sewn a cotton satin bias tape to make the drawstring channel. I used whip stitches and running stitches with double thread. The bias tape is really smooth and soft to touch.


7. I hemmed the skirt using a slip stitch.This process took a while.

8. My boyfriend made a sash for hair and waist in ruby cotton sateen.

9. Final fitting with chemise and petticoat. I decided to avoid short stays, in pure Merveilleuse style!

 10. And I was done! Photos of the finished thing in the  next post =)

Thanks for reading!

lunedì 27 marzo 2017

White cotton Directoire dress (1795-1800): let's start!

Some weeks ago I announced I was going to make the Danish white chemise dress for my Directoire events in Riva but the amount of custom orders forced me to finish other things before starting to work on my own dress and actually, I'm late. Really late, if you consider the event is this Sunday.
Ok, let's take a breath all together. 

Directoire fashion is a transitional moment. I have seen a great variety of gowns, fabrics and style while looking at the fashion plates of the time and I realized I could easily alter a late chemise à la reine or a very early Regency gown - and so I did. I used a reference this beautiful indian muslin white dress dating to 1796 as reference (but without the embroidery and the long sleeves).


Other references...

1797 - The Duchess of Osuna, her daughter and granddaughter (Agustín Esteve y Marqués)

1795 - The Duchess of Alba (Francisco de Goya y Lucientes)

Gaspare Landi (1756-1830) Ritratto di gentildonna.

These dresses feature the new, stylish high waistline with gathered neckline but the fitted elbow sleeves so typical throughout 18th century and so I decided to make elbow sleeves as well.

Construction:

I didn't took photos of the cutting process but I can say I used the bodice pattern of the drawstring gown by Sense and Sensibility "Portrait dress" pattern. It worked beautifully! I just raised the waistline to fit my underbust and the rest has been left unvaried. The back of this dress is fitted so the drawstring will run just in the front of the neckline. The waist will have drawstring too so the back of the dress will remain open a little. I don't worry about the gap, first because I'll wear proper underwear and second because I'll leave my hair down... ah, the beauty of Directoire fashion... :)
I forgot to say the fabric is white cotton cretonne I got from a massive sale on Tessuti.com at half of the price. Yay! I won't line the bodice to have a light, soft, summer dress. A proper open robe will be made in the next months.

I cut two simple rectangles to make the skirt, which is approx. 150 cm wide and long enough to reach my feet.
The mock up on the dress form:

Un post condiviso da Il Fiore Nero (Danielle Fiore) (@ilfiorenero_handmade) in data:


The sleeves are from the same pattern. Since I 'm out of time the inside of the dress is machine made and serged to last but the outer finishing will be made by hand, of course.
And that's all for now! I will publish some updates this week =)<

Post in evidenza

Edwardian skirt and blouse, circa 1900-1905

I've always been fascinated by the style of early Edwardian era, with those lightweight blouses, fabrics, delicate laces and floating s...