Visualizzazione post con etichetta napoleonic. Mostra tutti i post

sabato 6 ottobre 2018

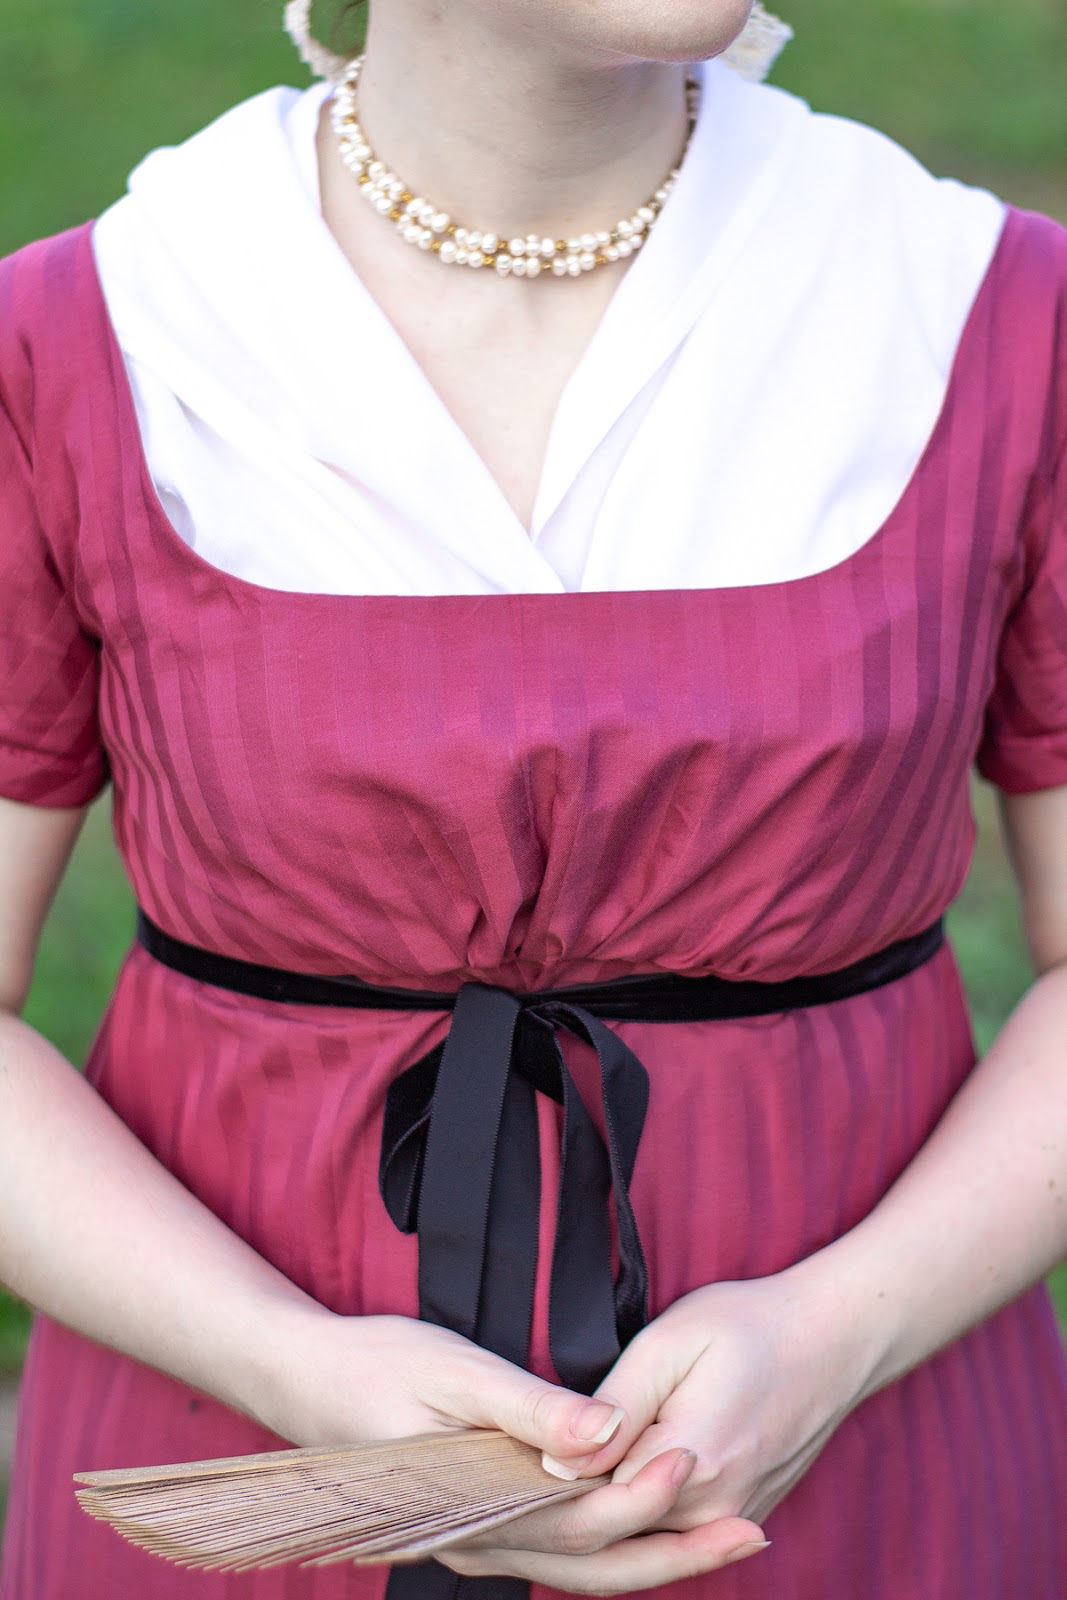
Regency dress "Boston", museum replica

Let me introduce this project. First of all, I've never been into Regency era. Oh well, yes, I've been, but never so much passionate; I prefer more fitted clothes, more structure and more volume. Yes, Empire gowns are extremely comfortable, easy to make and budget friendly (if you're going to make a day dress), look good on smaller body types like mine and are good friends in the summer heat but...they miss something. I don't know how to describe this feeling, I always feel like I missed something at home when I wear an Empire dress, probably because it looks like a modern dress rather than an historical one. 

Then I made Boston... and everything changed. 

Boston is not the he first Empire dress I made after an extant dress (read about the MoMu dress here) but it has something special. 

The weeks before the event in Marlia (Tuscany) I felt really down. There were high expectations from this event and my mind started to suffer; I felt like all my dresses were absolutely wrong, badly made, poor and miserable, all my patterns useless. I had too much pressure. The more my work goes on and the more I expect from me and my dresses. They have to fit in a certain way and have to be finished in THAT way; I would never, never go to an event with a machine sewn hem or a wrong fabric, I try to take care of every detail. So I feel really disappointed, sad and gloomy. I wanted to stay at home that weekend to work on other stuff. I also forgot to mention the dress I planned to wear (which now fits again!) was too heavy for the heat wave we had in September and my short sleeved green dress wouldn't have been a great replacement. So frustrating. 

Than my boyfriend decided to take me to the fabric store three days before the event. He wanted me to go because I needed that break away from home (and he was right). At first I refused; I was out of time to make a dress (I had to leave on Saturday morning and we were on Wednesday...) and had no ideas about. Then I walked into the fabric store and found this. The perfect fabric. Striped cotton sateen in burgundy. I  made a quick research on Google and Pinterest and found an extant dress at MFA Boston. It is more 1815 but our event was set in 1810s so it would have been perfect!

And so Boston was going to be made...


I had everything: a pattern, plain cotton for lining, buttons for the back closure, thread in matching colour and a lovely black velvet belt. I immediately pre-washed the fabric and luckily it dried quickly. The bodice was cut and assembled the same day, skirt and sleeves the day after so that I had the dress finished on Friday. I still ask myself how I did...but I did! And it was a success. Trust me, I never got so many compliments like on this gown! 
I altered a little the design of the dress to fit my pattern and I used buttons instead drawstring as fastening. There was no time at all to draft another model. The original dress has also detachable sleeves but unfortunately I don't have enough fabric to make them. 

And now the photos...


The original dress on the left


A success. The colour of my fabric is really vibrant and bright as shown in the photos, the stripes are of the same width of the original dress and so the sleeves. As told before I had to change some small details like omitting the piping and the ribbon at the back, but it's not a big issue. 
I got so many beautiful pics at the event, not like last year (when I was wearing an anonymous brown caraco some of you may remember - now sold). I'm so happy with this outfit I decided to offer copies of it on my Etsy shop

Other photos of the real Boston.... 

The detachable sash...

...and the detachable sleeves! 


lunedì 17 aprile 2017

A Regency red cotton Spencer (19th century)

It's Easter today so this means I'm having a break from sewing projects (believe me, it's a rare event!) and a break means..blog! Yay! I have a lot to write because the past weeks have been extremely rich in events and creations so don't waste time and let's start. 

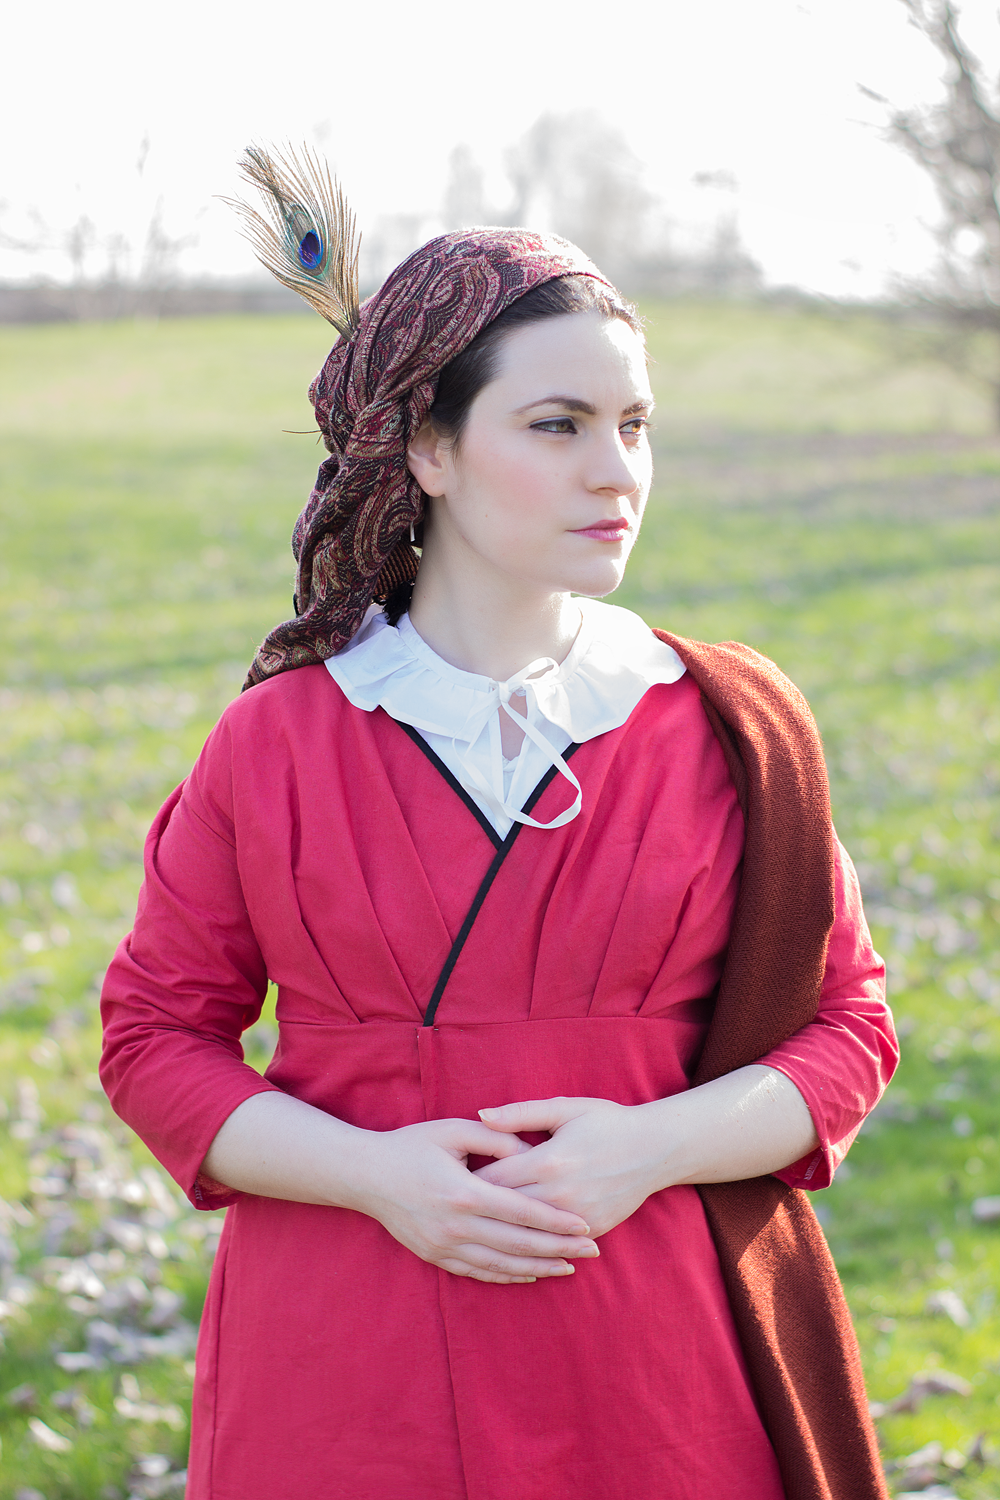
The first creation I want to introduce you it's a simple red cotton Regency spencer. I already made a spencer with a very late 18th century look last year and this time I wanted to replicate with a more 19th century feeling. I used Sense&Sensibility pattern (no time to draft something by my own) using a red pique cotton I had in my stash. I used the double breasted option with self fabric buttons. So lovely!
The revers are made of black linen, all from stash. The lining is cotton. I had some problems with the sleeve gathers but we'll talk about this later.

The body of the spencer fitted perfectly at the first attempt (considering the bulk of the dress and undergarments I chose a size 14) and I couldn't be happier! The instructions are really easy to follow but must be read carefully. The back has a perfect diamond shape with dropped shoulders and the front is shaped by darts. 
The cap of the sleeves is gathered in the back so that there's enough space for movement and wearing ease. To be honest I dislike this position because I think they give a bulky look but I can live with it; next time, however, I'll make a classic straight sleeve. The sleeves themselves also have a strange shape but they were definitely easier to put in position that the ones in the red crossover dress. 
The wrists have a sleeve band with fabric button and buttonhole. I'm so glad I decided to put them, they're really useful to keep the sleeves up and in place. 

The facing was really quick and easy. Since it wouldn't be shown I hemmed it by machine. The whole item is machine sewn inside but with outer finishing (buttonholes excluded). I hemmed the sleeves and the lower portion of the spencer by hand. 

I decided to add this garment on my Etsy shop as made to order item.


I also recorded a making-of video, you can find it on my Youtube channel! 


martedì 7 marzo 2017

A Regency crossover gown

Last month I started to use the S&S patterns my bf gifted me at Christmas and with an incoming event approaching, I decided to make a new dress using some old Ikea fabric in my stash. I really liked the idea of a crossover/wrap gown, definitely different from my other drawstring dresses. I loved the fact to have a front opening dress with pleats at the front, definitely something eye-catching. So I went for "The Elegant Lady's closet" pattern.

Before proceeding with the post, I'd like to say something to beginners. The instructions for this pattern are not so simple as they seem. The bodice calls for a separate lining (not the easiest thing to understand for people not involved in historical costuming...), an extra skirt layer (the easiest addition), dropped shoulders with sleeves set in the back. Trust me, these are not so immediate steps for a beginner. I would recommend to avoid the separate lining and proceed with a basic one (so using the front pieces of the bodice as guide) and to do a mock up of the sleeves before cutting the final fabric. I basted, stitched, ripped  the sleeves various times before getting a clear idea of where they have to sit - especially for the seam. Where's the seam? At the side? At the back? At the front, as in 18th century? A mystery. I placed my seam on front but I'm really not happy. 
Mark everything when transferring the pattern onto the fabric and things should go easily. I also recommend to add the extra skirt layer on the front to avoid a gap while sitting or moving; you should obviously wearing a petticoat underneath but a white gap in a coloured dress (like mine) it's not so fashionable so why make economy for a extra yard of fabric only?
I also avoided the self fabric binding, binding the upper edges with black bias tape to create some contrast. I have seen something similar in a fashion plate of the time.
The skirts are put together using french seams, while the upper edges have been serged. Every hem and the binding is hand sewn. 

Despite these things, the pattern is really easy to put follow. At first I wanted to gather my front pieces but I realized it would have been really bulky so I followed the instructions making the pleats. Much better! My dress closes from left to right, I founded it easier being left-handed. It closes with a pin at the front but I will add some hooks and eyes for more support. 
The back fits tight so measure yourself carefully before cutting the fabric. Chemise, stays and petticoat add some cm to your measurements. 

I matched the dress with the brand new chemisette I made always from S&S and the outfit was so cute! Unfortunately we didn't took many photos during the event due to the bad light but we'll take new shots in two weeks when we'll be again in Stupinigi!
Some photos on the dress form directly from my Etsy shop:


venerdì 14 ottobre 2016

Cotton Regency dress: the blue dress from MoMu

Updates at 10/10/2016: I finished this dress, at last! It turned out beautifully. I added a black linen sash to make it more accurate. I wore it last Sunday during a Napoleonic event in Stupinigi and it was a success: it was warm (the day was cold and almost rainy), comfortable and bright! Despite being a day dress is was really colorful and the public noticed it in the crowd.
Below, here we have some photos of the finished dress.

More photos of the event will come in the next weeks!


Hi everyone! I've been so busy in the past month I couldn't write new posts BUT we have something new to talk about. Lot of things happened here so let's get started. 
A local group invited me to join a Regency event and I was really enthusiast since I didn't have new events planned for the season. Despite this I immediately realized I had to work hard to prepare a good outfit that had to be easy to sew, fast to finish, good looking and, obviously, historically accurate. A challenge, but I could do that.
I'm new into Regency costuming so I had to do lot of research before starting to think to my own garment. I had a nice blue cotton in my stash so I decided to save money and use what I already have; I spent several hours on Pinterest looking at extant gowns and faithful reproduction and I immediately fell in love with this blue silk dress from MOMU in Antwerpen. 


The caption states the dress is dated from 1800 to 1805 with cotton and linen parts. Unfortunately I couldn't translate the rest.  

I had everything, the same shade of blue for the dress and lightweight white cotton for the fichu so I didn't waste my time and started to work on that. I wanted my dress to be simple and versatile so I decided to use drawstrings as closure instead of buttons (you can find a good article about Regency dresses closures on Historical Sewing). I drafted the pattern by myself using my Simplicity pattern #8399 as reference. You could ask why I used a Titanic (so Edwardian) inspired pattern to make a Regency dress. Well, the answer is simple: the Titanic inspired pattern has more a Regency line than a slender, Edwardian look, and you can figure it out just looking at bodice and skirt pattern. The skirt is really puff at the back while it should be tighter and without fullness. 


I used two pieces for the bodice and skirt. Since I don't like short sleeved dresses I drafted my sleeves to be elbow length. The bodice is lined in cotton with contrasting blue piping at side seams; the lining has been stitched to the skirt seam for a neat finishing on the inside. I sewn the drawstring channel by hand using blue bias tape and simple running stitches. The skirt is hand gathered at waist at front and back.
The curved sleeves of the original dress are typical of the late 18th century; mine are straight and reach the mid of my forearm. 


I used a temporary sash with bias tape. 
Every hem has been hand sewn for an accurate look. The fichu is made of white cotton and is entirely hand sewn with slip-stitches. 

The dress was finished in a couple of days (I would say 3) but being in July I faced the truth: my cotton was too heavy to be worn in the summer heat (the event was on July 31st...) with chemise, petticoat and stays underneath. I was really disappointed but I preferred to save my health and go to shop for another fabric. So sad...

martedì 20 settembre 2016

A Regency day in Osasco: dress and undergarments

If you followed me for a while, you may know I'm kinda new to 18th century and Regency costuming. Being definitely not what you can consider a tall lady, I've never been a huge fan of high waistlines and raised breasts because I considered them bad looking on me. I was wrong. Really wrong. My perception of Regency era simply mislead by movies, period dramas and lack of knowledge. Being honest and admit your limits is the first step to open your eyes and start studying seriously a certain historical period and fashion. 

Period dramas and so on forced the public to think Regency fashion was something delicate, extremely feminine and with a great freedom of movement given by the lack of corsets, heavy undergarments and underpinnings such as panniers or pocket hoops. Many ladies I know who sewn a Regency dress think the same but this is partially true. Regency women WORE corsets, even if they were surely more comfortable and less constrictive than their predecessors. They wore several layers too, such as chemises, petticoats, chemisettes and so on. 
So, after making my own and serious researches I radically changed my point of view about Regency costuming; those dresses looked bad on me because of the lack of proper undergarments. That's all. You don't need to be tall to look good in your historical outfit.

After all these considerations, I can (finally) tell you something more about my first Regency event. Two months ago (ok, I'm a little bit late!) I was invited by Le vie del tempo to join one of their events at Osasco castle; I didn't have an early 19th century wardrobe so I had to sew or purchase everything. I mean...everything. The only thing I had was a pair of flat shoes. Sounds great, uh?

I started with a bodiced petticoat. Since we were at the end of July I decided to skip the chemise to survive the italian summer heat (I failed) and I drafted the pattern for my bodiced petticoat in a while; it's a basic top with a gathered skirt at the underbust with hooks and eyes at the back. I used some cotton in my stash and I sewn the hems with a basic running stitch. The garment when together easily and without surprises. Phew!! 
Then the corset or - better - the short stays. They're made of two layers of cotton with plastic boning and metal grommets, not accurate but I was out of time and on a budget. I drafted my own pattern and since I'm not busty I avoided the gussets. 

Bodiced petticoat with pinned stays

Now the fun part - the dress! I originally planned to make a blue cotton dress but the cotton I had was too heavy to be worn at the end of July (and still is...) so I run to the fabric store to look for a lighter fabric. I ended to buy the same fabric of my Ancient Roman green tunic with some extra satin piping for the back seams. 
Ta-dah!

I wanted a drawstring dress but my bodice wasn't big enough to be gathered; after consulting Historical Sewing again about Regency dresses closures, I went for buttons at the back. I put piping at side back seams and between puff and lover sleeve but adding it to the neckline has been a mistake. The neckline became too heavy and large for my bust and needed to be filled with a fichu. 


I don't have nothing new to say about the construction; the dress is made of a 5 pieces bodice and a two pieces skirt partially gathered. That's all. For a fuller skirt, just add another panel and you're done. 
I have larger biceps than an average woman of my size so I wanted to hide them with long sleeves. A mistake, again. But they were really nice. 

Here you can see how the gathers look. I love how the piping came out! 


The ladies from the group especially loved the braided hairstyle my boyfriend made me that morning. 


Indeed he really did a great job! 

Some photos from the event:


Post in evidenza

Edwardian skirt and blouse, circa 1900-1905

I've always been fascinated by the style of early Edwardian era, with those lightweight blouses, fabrics, delicate laces and floating s...