Visualizzazione post con etichetta abbigliamento. Mostra tutti i post

martedì 19 gennaio 2016

A medieval-fantasy gown: Eowyn

Do you remember the green and gold velvet gown worn by Eowyn in "The Two Towers"? The movie came out in 2002 and since then I've been a huge fan of that dress. It looks soooo medieval, with the long hanging sleeves and the beautiful gold details...a dream! I never had enough budget to buy a replica of the costume so - ta-dah! - I bought a commercial pattern to sew my own version. The pattern still lays in its envelope due to lack of time but I managed to sew a very personal version of the costume with matching colours but a different design. 


For this costume I used a beautiful emerald green crushed velvet as main fabric and gold satin for the contrasting panel and the lining of hood and sleeves. I'm not a fan of poly satin 'cause it frays a lot and it's looks really cheap but you know - budget is budget. To my customers I recommend to choose taffeta, which has a richer texture than satin and looks less fancy.
The dress design is a classic: a medieval-fantasy dress with hood and square neckline, with front and back lacing. Nothing new but this is the kind of dresses which fits me at best and I love to make. 
The lacing is made of fabric eyelets and satin ribbon. To hide the arm seam I hand sewn a piece of gold trim. 


The dress is really comfortable and the lacing allows a perfect fitting. I enjoyed a lot these photos in the woods - the beautiful necklace I'm wearing is by Aeternum Nocturne Jewellery
The hood is wide and covers the head like a glove, falling on the shoulders when not worn. The satin lining falls nicely on the skin and I love how it turns on the outside when the arms are left in a lower position. The crushed velvet is so bright and follows the curves of the body, a blessing for ladies who have large hips like me. 

Some professional photos:


This costume is listed on my Etsy shop and can be ordered in different sizes and colours. Feel free to leave a comment if you have questions about! 


mercoledì 9 dicembre 2015

Confessions of a Gothic model: The Dark Angel Clothing

Hello guys! Today I'd like to start a new series of entries about the gothic lifestyle and fashion.
As gothic girl, I always loved the iconic dark fashion with bat or  long sleeves, corsets and long skirts, and as gothic model I purchased several stuff in these years to make my closet bigger and interesting. 
I'd like to talk about the brands I bought in the past. Some of them are no more active but their products deserve a review. In addiction, I'll talk you about the handmade items I got as sponsor or gifts - the handmade world is so amazing! 

So, let's start with one of the best gothic brands of the world: The Dark Angel Clothing. Many of you surely heard about them, they're active since the early 1990's. They offer a unique range of gothic, fantasy, medieval inspired clothing of high quality. Believe me, their designs are fantastic. 
I own a top and a corset from them and yeah, I can say the materials are really good and the manufacture is excellent. The first item I saw by them on the web is the famous Christina gown in purple; I was browsing the web for some nice gothic images and I immediately fell in love with that dress. The gown is still listed on their shop after so many years so it deserves a visit:  


Look at those sleeves and the vibrant colours! Unfortunately I never had enough budget to buy this dress, so it is in my wish-list still. Another gown I always loved it's the beautiful medieval-gothic Kelmscott gown (someone told me I look like the model wearing the dress hehe).

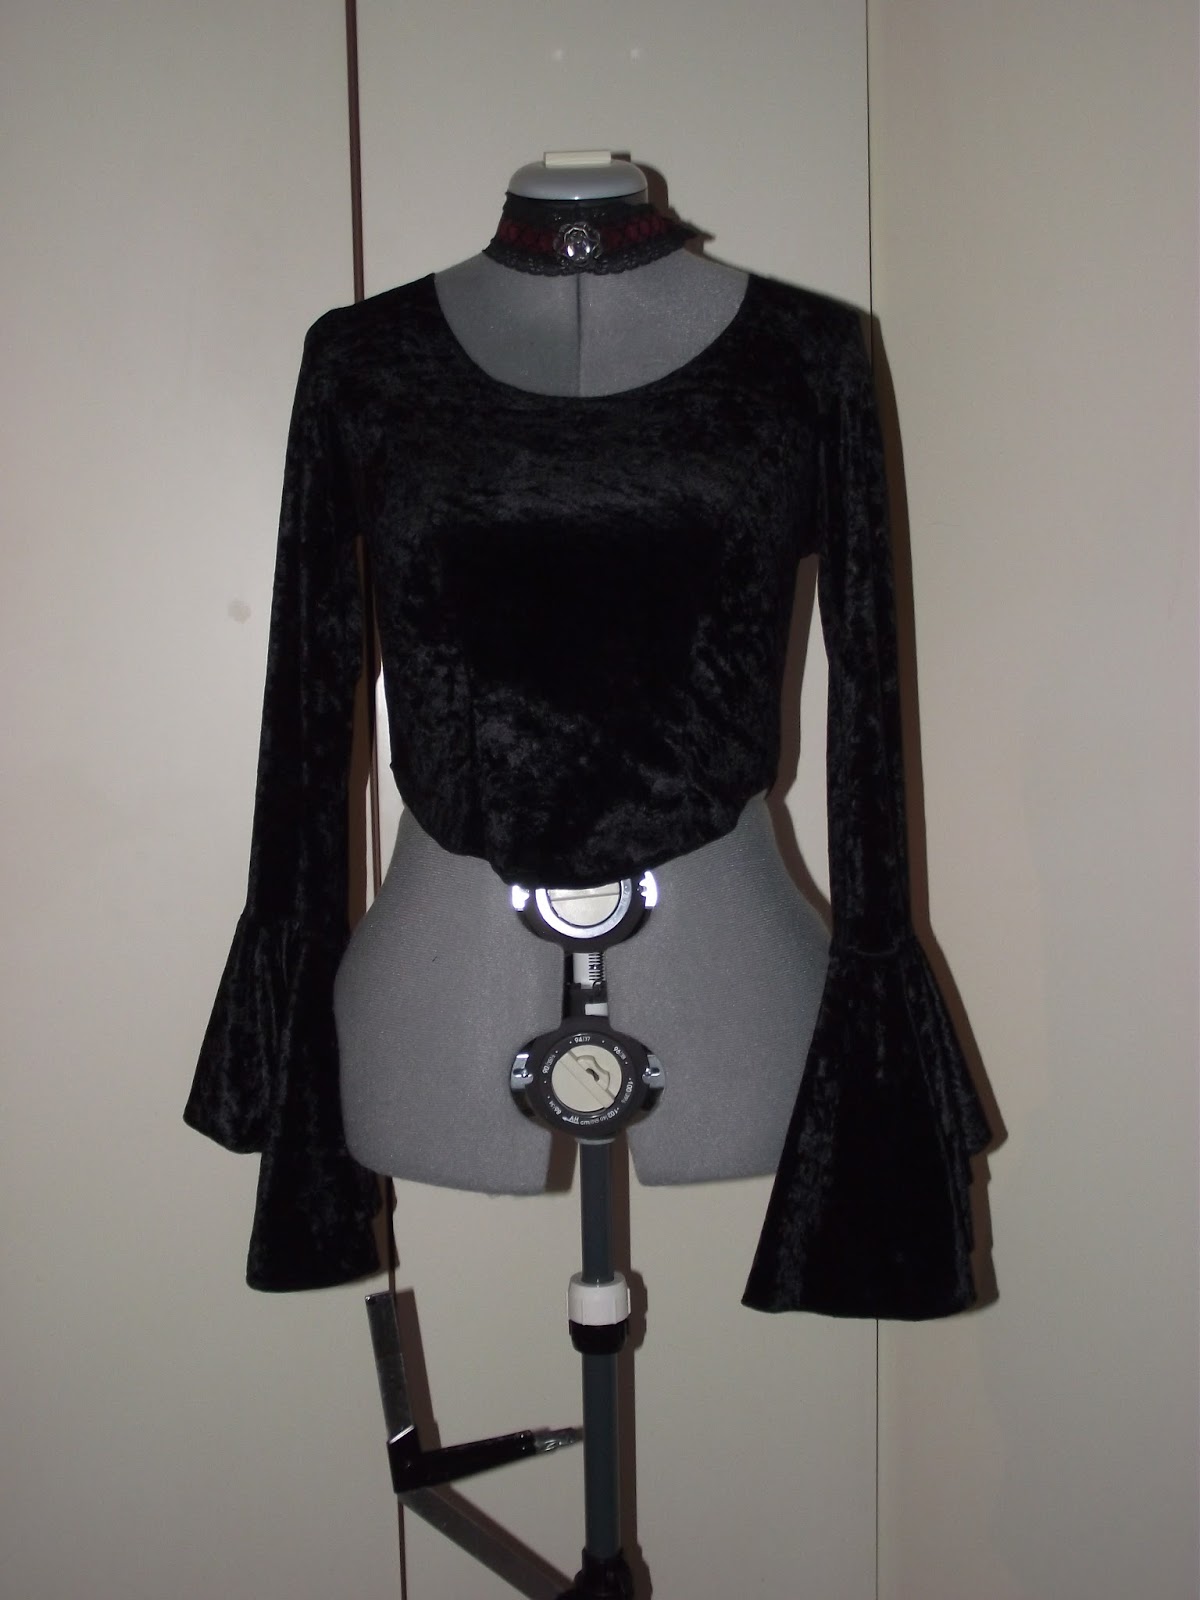
But let's talk about the items in my closet. As I told you before, I'm the lucky owner of a top and a bodice. The top is sadly discontinued but it's a beautiful rococo style top in black crushed velvet and bell sleeves; it fits perfectly and the fabric is really soft. I worn it a couple of times during my photoshootings;


The top has a very high waistline so I had to wear it with a matching corset but you can leave it free if you have a nice belly. A very similar version of my top with lace is still listed on their website

The corset is not properly a tight corset, but more a bodice as they explain in the website. The boning is made of plastic and it is the only negative feedback I can leave to this brand: a spiral steel boning would have been better, helping the corset to keep it's shape when worn. Despite this, it's beautiful. It's made of soft cotton velvet with satin bias tape all around and black trims. 
The bodice is no more available in the red version but you can find it in black, purple and green. 


The bodice closes on the front with lacing and it's plain behind. The fabric is incredibly soft, a big deal compared to the reduced price (about 30€). 

That's all for now! Do you have a favourite gothic brand to talk about? Let me know! 


martedì 24 novembre 2015

Sewing an ancient Roman dress: a short tutorial.

If you had the chance to read my entries for a while, you should have noticed I'm an ancient Roman reenactor and fanatic. I studied Roman History at University and since then I'm totally crazy about that. As reenactor I need to have accurate outfits to be worn during events and as seamstress I love to take care of the details. 
Sewing an ancient Roman dress is not difficult but requires a little bit of historical research. I wrote about Roman fashion in the past and I don't wanna repeat myself, so I hope you'll enjoy this short summary. The basic garments of an ancient Roman woman were three layers, a tunic, a stola (if married) and a palla, an outer garment which was worn in public by respectable women and could be carried on the head as veil. The tunic, as you can imagine, was the foundation of their wardrobe. 
Building a Roman tunic is not hard, there are several images and tutorials on the web but be careful, most of them talk about the ancient Greek fashion, which is similar but not the same thing. Forget the lascivious costumes worn in movies and fictions, Roman women were more modest you can think! 

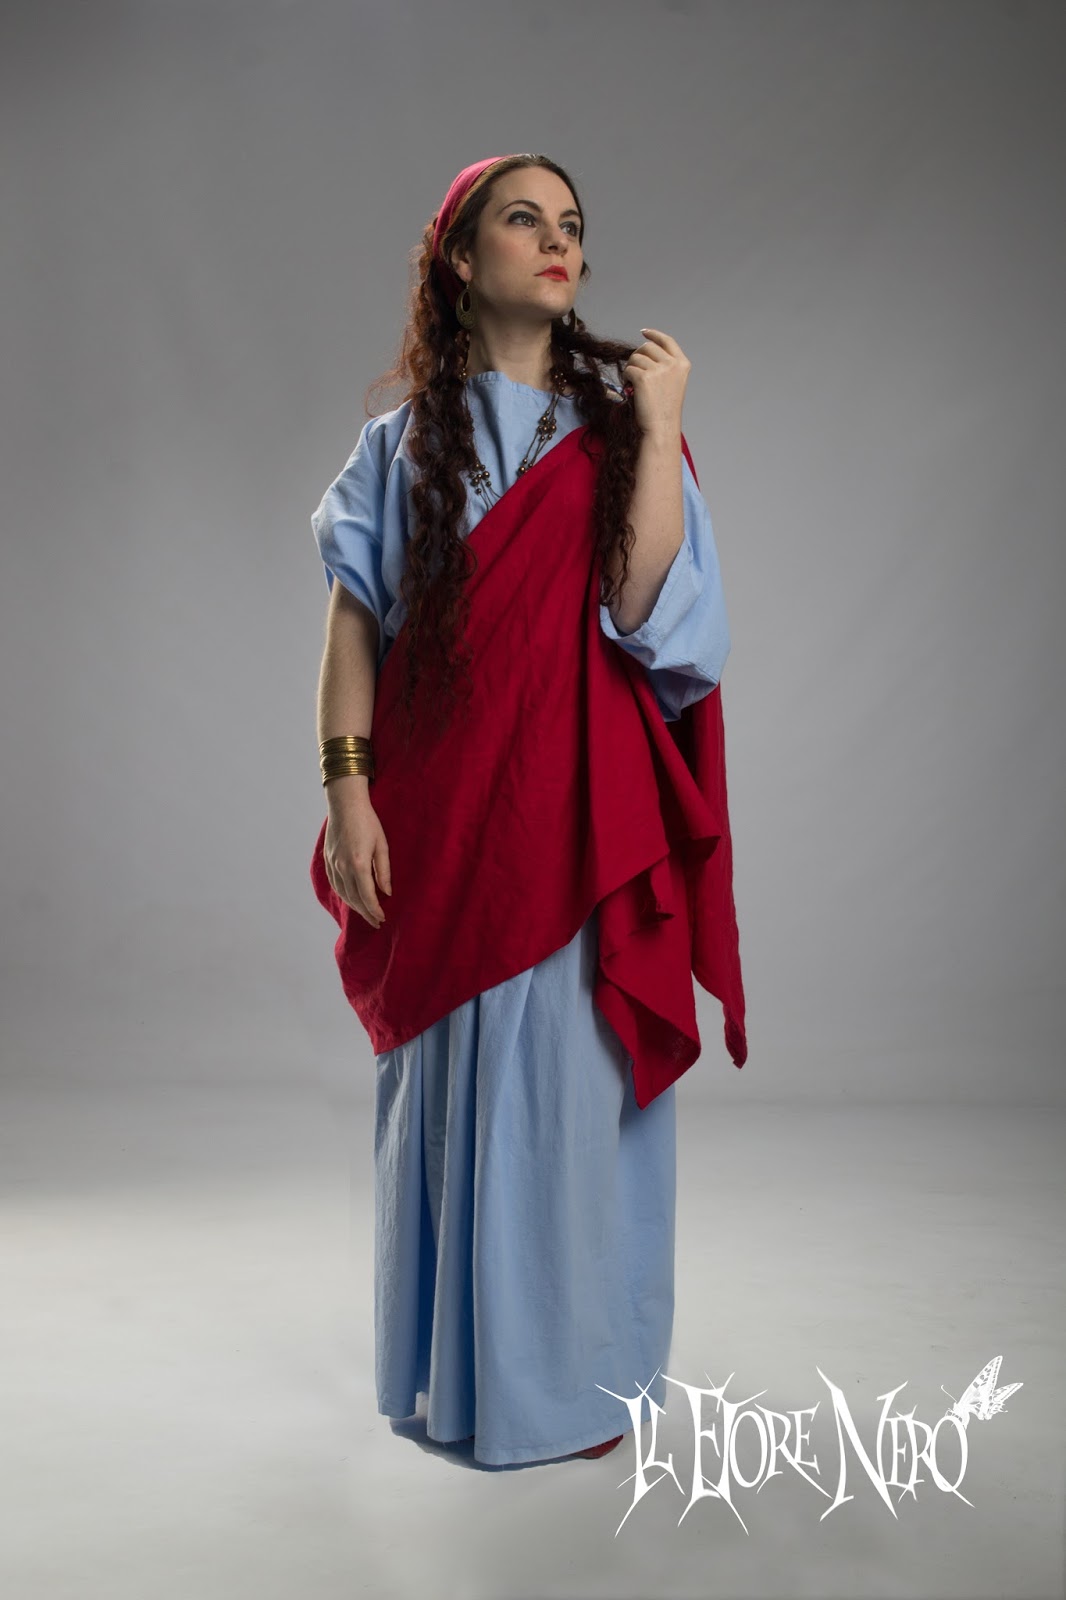
So, for the last event in Acqui Terme I needed a new and more historically accurate outfit, which included a palla and a veil. I was out of budget so I couldn't sew a stola, but it's ok if you wanna portrait a young and unmarried woman (smart solution!). I wore the outfit again last week for a nice shooting with the guys of Light&ART studio. 

Before talking about the construction, let's see some references: 


The most accurate form of tunic is a wide, long, rectangle of cloth which is sewn at sides and open above, to let your head and arms get out. It looks simple, uh? The tunic was draped around the body with a long belt, which was tied under the bust before and around the waist later, giving the dress the classical puffy shape. Ancient roman fashion didn't have supporting garments as corsets so the belt under the bust is a help to keep everything in place. To obtain this famous shape you need a long tunic, almost the double of your height from shoulders to feet. 
So, after determining the height of your tunic all you have to do is sew at sides, from selvage to selvage. Here there's a scheme for the ionic chiton, but the process is the same: 


You should have at this point something like this: 


Once you're done you have to wear the tunic and mark your fastenings with the help of a friend. An accurate solution would be pins to close your sleeves but I went for some decorative buttons. My tunic has been dyed in light blue but you can choose other colours. Don't leave it white! When your tunic is fastened you can proceed with the belt (a piece of cord or a braid would be perfect). The palla was the equivalent of male toga, so sew a continuous piece of fabric of oval shape; my palla is in red linen and matches my hair band. 

To give you an idea of the finished outfit, look at the following photos or read my previous entry about Acqui & Sapori (there are other photos of the costume in action). For my tunic I sewn all hems by hand, this decision it's up to you. 


The veil is a small rectangle of fabric handsewn to a hair comb. Even in this case, I sewn all hems by hand. The hairstyle will help you to keep the veil up so it's important to choose a lightweight fabric. For the hairstyle you can use bobby pins or - more accurate - wooden forks. A tip for your hair: curls, curls  and more curls! Use extensions if your natural hair are not long enough, Roman women did the same with real human hair or wigs. 

Photo by Raffaele Boni Photographer

 The whole outfit was finally completed with lot of jewels - bronze, gold or silver are acceptable materials. If you have some questions about this kind of costume, leave a comment!

venerdì 18 settembre 2015

Tutorial: convertire una gonna in un maxidress!

Oggi un tutorial di cucito facile-facile! 
Avete presente la sensazione di dover acquistare a tutti i costi quella gonna perché vi fa impazzire, anche se vi arriva sotto ai piedi? Ebbene, è ciò che è successo a me qualche anno fa, con questa gonna. Adoro da sempre le cose plissettate (assieme ai fiori, la fantasia mimetica, ai pois e moltissime altre cose...) e quando l'ho vista non ho saputo resistere. Ahimè, la mia taglia di fianchi corrispondeva a una delle misure più grandi e a circa 175 di altezza, ma l'ho comprata lo stesso, fiduciosa di riuscire ad utilizzarla. Con mio sommo rammarico, è rimasta nell'armadio per quasi due anni finché non ho avuto l'ispirazione di convertirla in un maxidress.

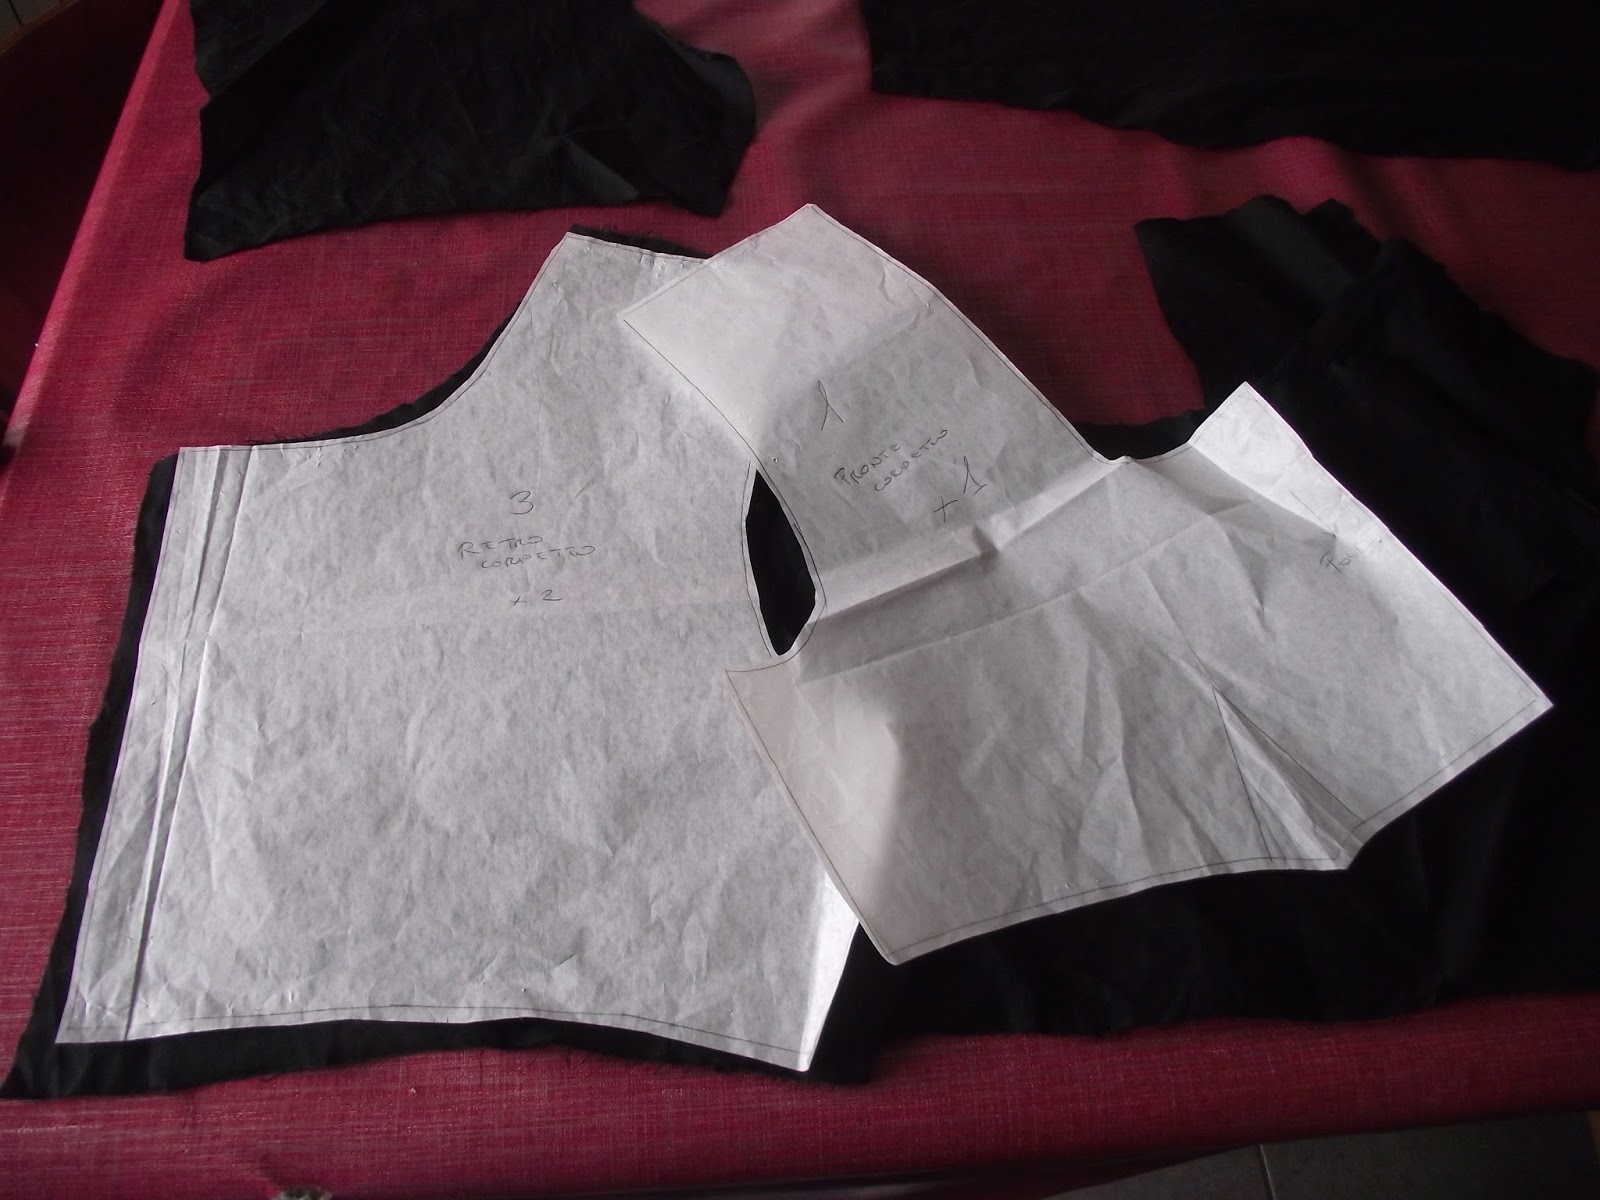
 Il processo è semplicissimo: ho disegnato un top a manica corta da attaccare all'elastico della gonna, che sarebbe così diventato il nuovo punto vita. Ho scelto del semplice cotone nero ma potete utilizzare qualsiasi stoffa vogliate (raso, jersey, lino...). Dopo aver provato il cartamodello sul manichino ho proseguito con il taglio e la rifinitura a tagliacuci. 
Per un effetto più curato vi consiglio di tagliare la parte frontale del corpino sulla piega della stoffa, in modo da evitare una cucitura nel mezzo. Se non avete una taglia e cuci potete rifinire le vostre cuciture con il punto zigzag oppure, per un risultato più pulito, una cucitura alla francese (di cosa si tratta? E' un sistema un po' laborioso ma davvero facile: cucite i vostri pezzi di stoffa dal dritto, quindi al contrario di come fate di solito, poi rifinite con le forbici la cucitura ottenuta e stirate, ripiegando il tutto al rovescio; a questo punto, cucite nuovamente e rivoltate tutto dal dritto: la nuova cucitura avrà inglobato quella precedente e avrete un lavoro pulito, ordinato e dall'aspetto più professionale! In poche parole, la cucitura del rovescio si "mangia" quella eseguita sul dritto e quando osservate il capo a rovescio non avrete fili sfilacciati che pendono dalle vostre cuciture). La quarta opzione è quella di foderare il tutto, processo che eseguivo in quasi ogni progetto prima di acquistare la mia tagliacuci (Il solo pensiero di applicare una fodera vi spaventa? Tranquille, ci va solo un po' di pratica e pazienza ma vi assicuro che il risultato merita!). 


Ho cucito le pinces all'altezza del seno e ho rifinito i bordi con del nastro sbieco nero in cotone, nella variante più piccola. Sul retro ho poi applicato una zip per poterla indossare più facilmente. Per applicare la zip ci sono diverse tecniche, il mio consiglio è di scegliere quella più adatta alle vostre capacità e di usare sempre l'apposito piedino.
La parte più difficile è stata calcolare l'ampiezza esatta del corpino in modo che combaciasse perfettamente con l'elastico della gonna, che deve restare invariato. Vi suggerisco di prendere bene le misure prima di inserire la zip; potrebbe essere necessario effettuare delle modifiche sul retro del vostro top e una volta tagliato...non si torna indietro. 
Come ultimo step, ho cucito il corpino all'elastico con uno zigzag per mantenere una certa elasticità. 


A questo punto, potete indossare il vostro nuovo abito e decorare il corpino come più vi piace. Facile no? Avete un nuovo capo nel guardaroba e non avete dovuto spendere altri soldi per farlo accorciare! ;)


Ed eccomi con l'abito indossato: lo abbino ad una cintura elasticizzata per un tocco più elegante.

Se il tutorial vi è piaciuto e/o l'avete trovato utile, lasciate un commento! 


giovedì 11 settembre 2014

My first gothic dress!

Hello folks! Today I'd like to introduce you my latest creation, a gothic dress!
Many of you (perhaps) don't know I'm a gothic girl and this kind of fashion was my daily clothing when I was around 20. Now I dress in a more casual way but (when I can) I put on my long black skirts and tops. As model, I spent so much money in buying gothic/victorian outfits for the shootings but, actually, I don't have enough budget to do online shopping. So, after a whole year of historical inspired costumes, I decided to sew a gothic dress by my own. I'm completely obsessed in what we call "medieval gothic", a kind of gothic fashion inspired by medieval times with long dresses and huge sleeves, tiaras, capes and so on; I have many dresses in this style but they're never enough (I'm a woman!) and I think this is the model which fits me at best. 
I used the same pattern of my previous medieval dress "Igraine" (tutorial here: http://daniellefiore.blogspot.it/2014/03/medieval-dress-igraine-tutorial.html) but with some differences since now I'm more expert. I choose a simple black crushed velvet for the main dress and the remnants of the burgundy taffeta I had from the Tudor dress (some photos here: http://daniellefiore.blogspot.it/2014/08/tudor-court-dress-pt3.html). I purchased some lace and a ribbon of black organza for decorating the neckline. The main difference of this dress are the lined sleeves. This was my first attempt with lining and I have to admit it can make the difference in a gown: the sleeves are so soft and captivating, refined and look more professional. I was scared since lining seemed so difficult to my eyes but I was wrong!  If you don't use it yet start to consider it, your clothes will last longer and will be more comfortable to wear (lining is also useful to hide the inner construction of the garment, as seam allowances, stitches and other things that can make your work look poorer). For gothic dresses I suggest the classic satin/taffeta lining, black for the body and in any colour/fabric you want for the sleeves. 

 photo IMG_20140908_214843_zps6be8a125.jpg

 photo IMG_20140910_160031_zps26efa0b9.jpg

Another detail of my dress: I lost some weight since march (when I used the pattern for the first time), so it fits actually large on the back. My pattern didn't include size 8 so I've been forced to pin it on the back. I wanted to apply eyelets but I don't know if they work good on crushed velvet so let's go for two simple seams. Next time I'll use a back lacing with lace at sides and a ribbon, which looks surely better than my seams :P
As trims I went for a classic black lace at center sides and black organza on the neckline which looks so elegant. I avoided the black lace on sleeves as well but I went for a burgundy one on my arm. I didn't take many photos during the construction but I'll use the dress for a photo-shoot soon. Note: the dress has to be ironed still!

Sorry for the blurry photos but they're taken from my Instagram account. 

 photo IMG_20140910_210436_zps7e0e133d.jpg


venerdì 8 agosto 2014

Tudor court dress pt.2

So, after working on the foresleeves I started putting together the bodice. This has been the most exciting part! The bodice has a very feminine form but (as I thought) the square neckline was too large for me. I noticed it immediately and after cutting front and back panels I shortened shoulders.  This process forced me to pleat upper sleeves a little, so my dress looks like a Tudor court gown with...puff sleeves. Yeah. *laughs*.

 photo 10526134_437075279768920_183374349323247851_n_zps60735b3b.png

Anyway, I chose as main fabric for the overdress a beautiful burgundy taffetta which looks sooo period without being too much expensive (5€ at mt more or less). I already faced this kind of fabric with a bought skirt which needed a new hem but this one is less soft and bright, so I think the skirt is made of silk taffetta, while mine is of polyester (reenactors, don't read!). I still have to iron it so don't watch the wrinkles.
The fabric, anyway, is really easy to be cut but be careful when starting to baste it: use a very thiny needle and make small stitches. This works with pins as well so pay attention when pulling them through the fabric because you may risk to torn it! Every stitch is almost visible with this fabric so be really careful and patient. I used pins to keep together skirt panels (but we'll talk about that later) and a normal basting thread for bodice and sleeves.

  photo 10556411_439510146192100_4416516258348471385_n_zpsae90c0d5.png

 photo 10245578_439539019522546_63121573837466998_n_zpsf33842ab.png

I'm totally in love with the end of the bodice. I have seen many Tudor gowns with rounded  bodice base but this pattern as a pointed base which drives me crazy everytime. I can't wait to attach the pleated skirt to see the effect!
I clean-finished the back bodice before proceeding with the sleeves and my boyfriend/tailor assistant/photographer has been so kind to apply eyelets on the back. The dress should be boned for a perfect shape and even if I decided to avoid them and wear it with a separate corset as underwear (girls, keep in mind corsets or stays are studied to stay under your clothes, not over as in the modern gothic-victorian fashion so don't think to put a corset on your Tudor gown!!), it needs eyelets. It's an important part of the dress because it gives a correct period look and no one will know if your gown is boned or not unless you won't say it. The corset gives a completely different shape to the bodice, it keeps your breast in place and gives you a better posture. I use a normal halfbust corset in burgundy velvet with steel bones.

Now let's talk about sleeves. Upper sleeves are a sort of normal t-shirt sleeves and you don't need more suggestions about them. Lower sleeves have to be discussed a little. While attaching the sleeve you have to work on the right side of fabric, because those big sleeves have to be reversed to show the lining. I didn't have enough budget to buy a contrasting lining so I chose a simple black satin which will be used for the veil as well. It's not so difficult: after sewing the sleeves take the lower edge and reverse it, attaching it to the upper sleeves. The lower hem will be the hem of the new, shining, sleeve. After this process, the upper part of your overdress is done (trims exclused, for sure).
Now, it's time to put the bodice on and attach foresleeves to the dress using ribbons. As I told before, foresleeves were tired to the main dress with ribbons sewn at the base of lower sleeve (where you reversed the sleeve, to be clear). My foresleeves still have to be finished with the inner sleeves so consider them a work in progress.


 *End of part 2*
Don't forget to follow me on Instagram for more photos! http://instagram.com/danielle.fiore

sabato 12 luglio 2014

Tudor court dress pt.1

Hello folks!
As some of you may know I'm working on a new sewing proect for some weeks: my first Tudor gown! I've always been in love with that period of English history and - of course - I love the dresses worn by women as Anne Boleyn or Jane Seymour (the style under Elizabeth I is quite different and is known as "Elizabethian"). I was planning to sew a dress like that from last year but I didn't feel good enough to start it and so I postponed this shopping. After a year I felt ready and I bought the famous pattern by Simplicity (and I've been lucky because it has been announced discontinued in March 2014!). While I was waiting for it I started to do a little bit of historical research about the real Tudor dresses and I discovered something really interesting: Tudor women wore skirts with a long train and a hoopskirt (the variation of the spanish farthingale brought in Englad by Catherine of Aragon) and - this was really surprising! - without pleats. If you look at period paintings you'll notice there are almost no pleats on their skirts so this is a big difference if compared to the pattern which requires cartridge pleating (cartridge pleating is when small pleats have to be stitched on a very thiny bodice - it's a long process to be done by hand exclusively).

I didn't have enough money to buy the huge amount of fabric for the overdress (8 metres!!) and so I started working on the underskirt and the foresleeves. Tudor ladies wore a multi layered outfit, from the white underdress to the final overdress, which was rich and extremely decorated for the court ladies; it's really important to wear the right undergarments with this kind of costume, so don't forget your chemise, your corset, your hoopskirt and at least one underskirt. I'll wear a black pleated satin skirt over my hoopskirt which won't be visibile once the dress will be finished: the central panel has to be worn as a small apron tied on your waist by a band and this fabric has often to match with the foresleeves.

What are foresleeves? This is the most difficoult step I met during my research. Finding a good tutorial about them has been really hard. Foresleeves are a sort of fake sleeves, often rich and decorated with pearls or buttons, which were tied to the main sleeves and could be changed when women wanted to. This is supposed to be due to the hot weather during summer or to simple fashionable reasons. Women could change their sleeves when they want and they can have several pairs. Don't be afraid when you'll look at pattern instructions: foresleeves HAVE to be big! The best result will be achieved with a lot of white lining pulled through the side and central openings, like in italian renaissance period dresses.
So I started working on the foresleeves and I've been immediately surprised by their size. They're really big and wide, I think I'll made them a little bit smaller in the next costumes because I feel them quite uncomfortable. After cutting the pattern and the fabric I cut the central stashes and I decided to trim them with some burgundy crushed velvet I had at home. It's not period at all but making an historical accurate garment is not my actual aim. Only this process took me a week only, I didn't have enough time and stashes have been really hard to be stitched.


Tudor photo IMG_20140623_143705_zpse1463576.png 

Now I can say I've a new friend:  bias tape. I never used it before and I was really surprised by the price (0.30€ at metre! Lovely!) and the huge amount of things you can do with it. It's surely better than the classic satin ribbons which can be ugly to see on the corners. Bias tape is perfect for trimming raw edges and corners, try it and you'll love it! You just have to take a moment to understand how to sew it: there are fast and simple techniques but a little training may be required. After learning how to sew it I trimmed the edges of my foresleeves and then started to search for a lining. Ok, I know. Lining should be stitched before the trim, but at first I didn't want it. Then I remembered to have some white cotton at home and I was pleased to discover it was enough for my lining. Unfortunately it doesn't come out from the stashes as I wanted/expected so I've learned something new for the future: cut your lining bigger than your sleeve, otherwhise your fabric won't be fluffy. Shame on me. I love how they turned out, the white lining gave a completely different look to my foresleeves! Then I sewed some ornamental buttons to keep sides closed and I LOVE, totally LOVE how they came out.

Tudor photo IMG_20140701_233420_zps44f2eb7f.png
The easiest way to stitch bias tape.


Tudor photo IMG_20140710_173855_zps7f833ad1.png
The pinned lining.


Tudor photo IMG_20140710_215658_zpsbb71b1b8.png


 photo IMG_20140710_215705_zpsa9edce25.png
Finished foresleeve.


Now the final touch: the ribbons. Foresleeves were tied with ribbons inside the dress to the main sleeve (the upper one) and so explains the rigid posture of Tudor court ladies.
Actually I'm waiting for my fabrics to come so I cannot explain you how to finish your overdress. I hope you've found this part interesting enough and feel free to contact me for any question!

lunedì 5 maggio 2014

Titanic - Downton Abbey inspired dress tutorial

Hello guys! After some days of heavy rain and storm we have sun, spring, hot weather and ice creams, lol!
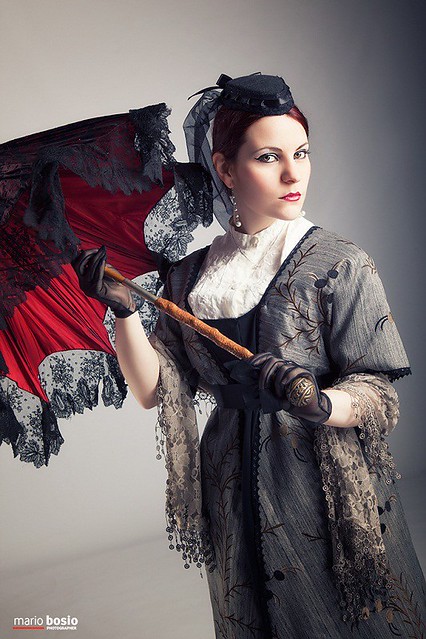
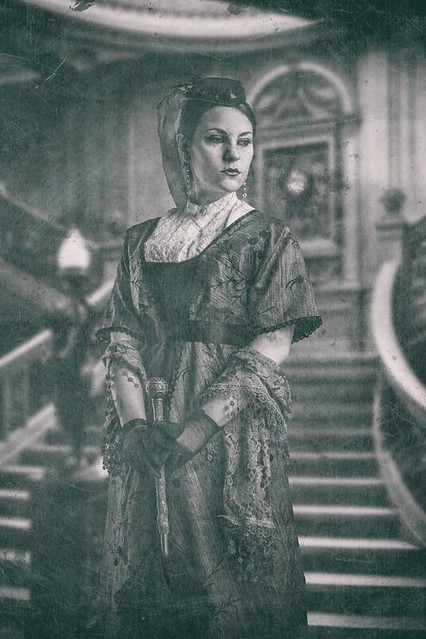
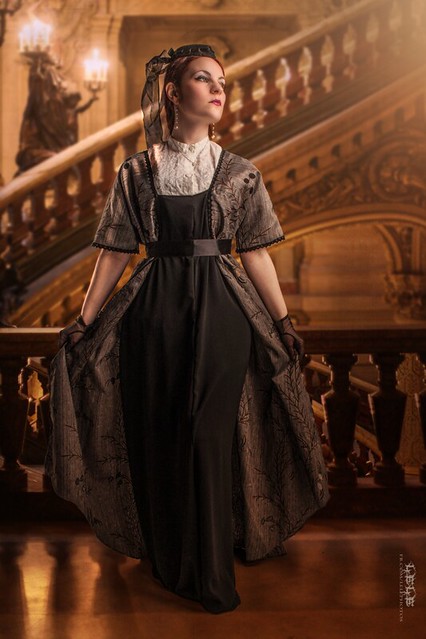
Today I'd like to talk you about my first Titanic - Downton Abbey - Edwardian inspired dress using Simplicity pattern 8399. I've always been in love with the dresses worn by Kate Winslet in Titanic (1997), and since I was a child I dreamt to wear an Edwardian costume. The pattern is not 100% accurate but it creates a nice look, though it needs some adjustments. First of all, the shape of dress is too large to be a perfect Edwardian dress and it looks more like a Regency costume, so I suggest you to choose a tight fitting. The back closes with a zip so if you're looking for  a good historical pattern,  this is not the one for you (you can always change the zip with some buttons). The pattern includes two dresses inspired by the movie Titanic, the swimdress and the jumpdress; for my costume I used the swimdress pattern (model A) which is more "daily" and simple. The original dress is made of several layers of chiffon but for mine I used two fabrics only, overdress and skirt. I'm planning to sew a good replica of the swimdress in the future, but for the moment I need to improve my skills. 

 photo DSCF0380_zps5338d46a.jpg


The fabric I used it grey silk with a georgette black skirt, the ribbon is of black satin. I used a normal white blouse I had in my wardrobe as bodice. As underwear, I wore a longline corset to recreate the Edwardian silhouette a little. The gloves are true vintage gloves from my grandma while the hat comes from a flea market for a couple of euros! I know the hat is not Edwardian but I don't have another one heheh *blushes* 

So, for this model you'll need:
- Pattern (of curse)
- Fabric
- Lace/trims
- A blouse/white bodice
- Satin ribbon
- Many accessories as gloves, hats, jewels

My fabric was a gift so I've been very lucky, and I had to buy the skirt only. I started cutting the two pieces of the over dress and I noticed immediately it was really large to fit the Edwardian shape (so avoid the piece 6A included in the pattern); the overdress bodice has been really fast to cut and sew because the sleeve is included in the main piece. I attached it to the overdress skirt easily and then I've been forced to accept the challenge with the remaining fabric of the skirt back: I did some pince inside the dress to hide the excessive fabric but next time I'll do a tighter cut. 

 photo DSCF0381_zpsd2607484.jpg


 photo DSCF0387_zpsf6312d9a.jpg


 photo DSCF0384_zpsb6637d88.jpg


 photo DSCF0385_zps5b3e1130.jpg

After sewing the skirt I basted it to the overdress and put the dress on with the white blouse. Then I sewed the pieces with the sewing machine and added two carriers for the ribbon on the back. The final touch has been the black lace all around the sleeves and the overdress hems, and this part took me a while to be completed since I proceeded pinning the lace to the fabric and sewing it step by step with the machine.

 photo DSCF0388_zpsf6a5acab.jpg
The basted dress on

That's the finished dress on during a shooting:

Edwardian Times

Dinner on the Titanic

Edwardian Dress 1912

Post in evidenza

Edwardian skirt and blouse, circa 1900-1905

I've always been fascinated by the style of early Edwardian era, with those lightweight blouses, fabrics, delicate laces and floating s...