Visualizzazione post con etichetta abito. Mostra tutti i post

martedì 15 novembre 2016

Come arricciare un tessuto - Tutorial di cucito

Avete presente quelle piccole, simmetriche, arricciature che troviamo spesso nei nostri abiti, ad esempio nelle maniche o nelle gonne? Bene, in questo tutorial vedremo come imparare a realizzarle con la nostra macchina da cucire, a casa e con tranquillità. 

Prima di iniziare, assicuriamoci di avere a portata di mano:
- Stoffa
- Filo 
- Forbici
- Appositi piedini

Le arricciature possono essere realizzate in due modi: con il piedino o senza. Il procedimento con il piedino è spiegato in maniera dettagliata nel mio video tutorial, che trovate su Youtube:


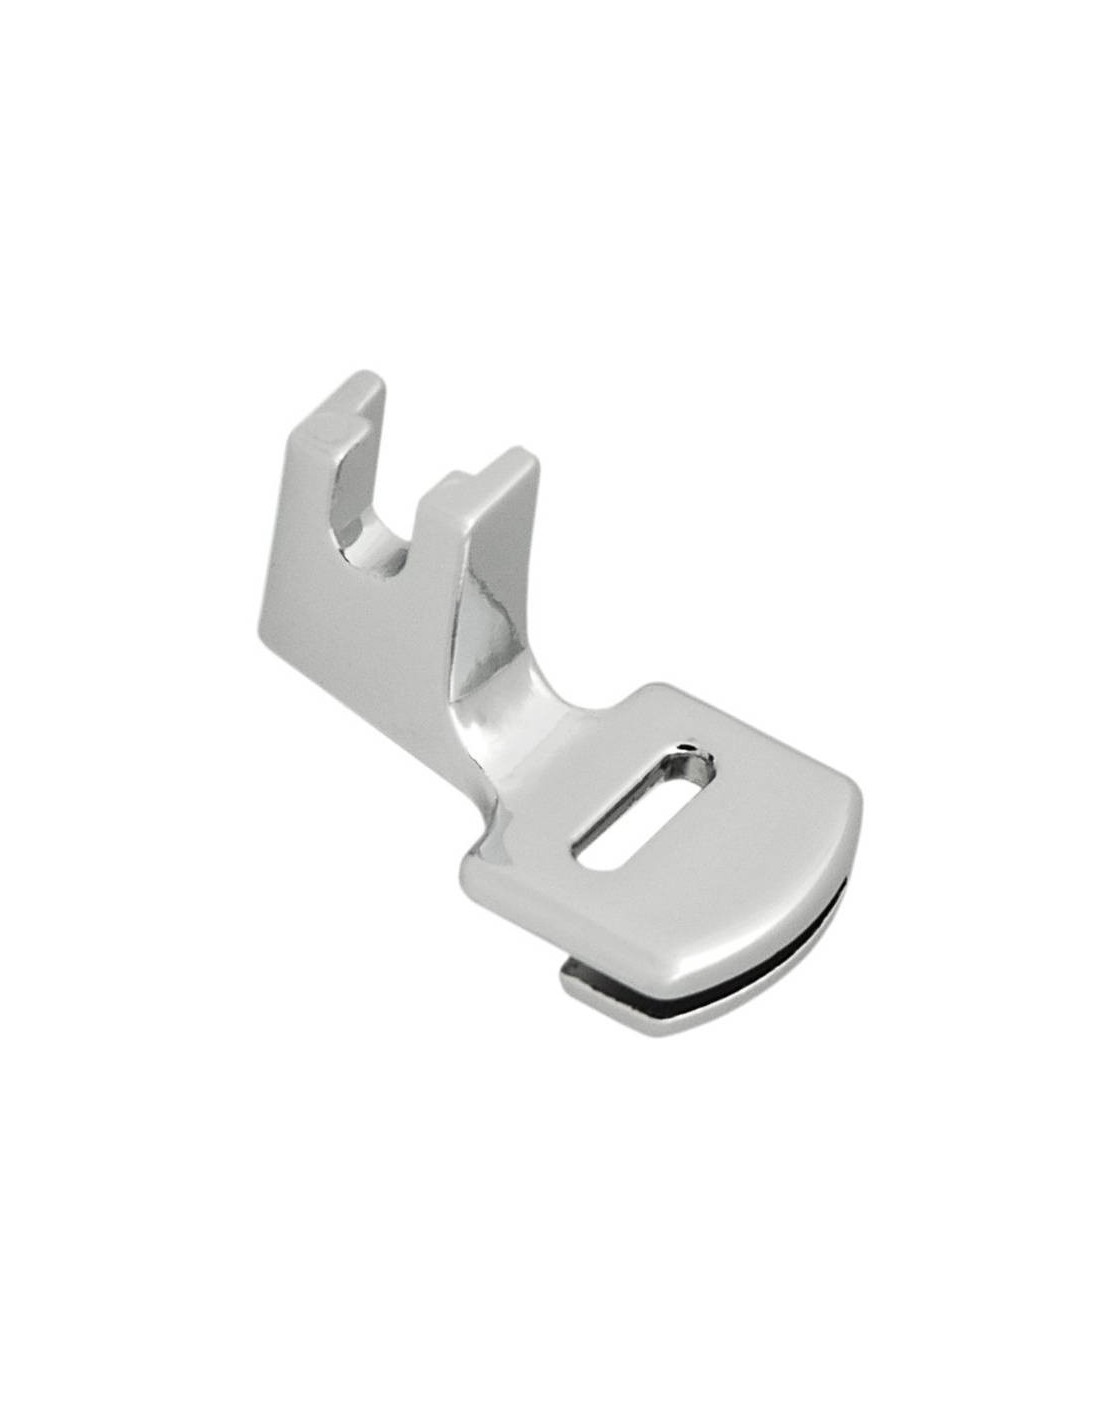
Ed ecco il piedino: 


Utilizzarlo è davvero semplice: dopo aver rimosso il piedino standard con l'apposito cacciavite dato in dotazione inseriamo l'increspatore e posizioniamo la stoffa in modo che combaci con l'estremità destra del piedino; dopo aver aumentato la tensione del filo possiamo iniziare a cucire. Et voilà! 

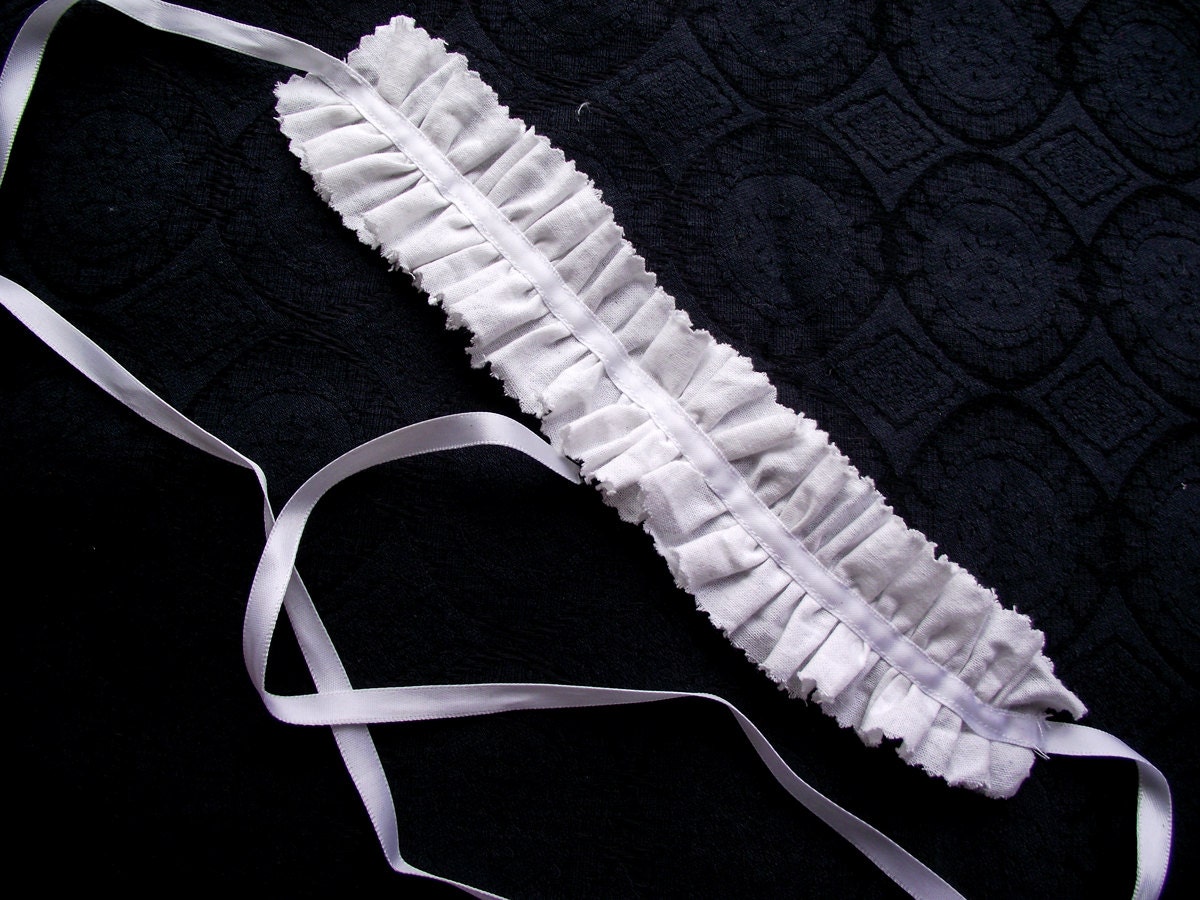
Se invece non possediamo un piedino c'è una valida alternativa: aumentiamo la tensione del filo e la lunghezza del punto, raggiungendo la lunghezza massima consentita dalla nostra macchina, cuciamo e distribuiamo le arricciature tirando con delicatezza i fili. Otterremo un risultato molto simile a questo: 


Il consiglio è lasciare una coda molto lunga sia all'inizio sia alla fine della nostra cucitura.
Ora non vi resta che provare e far pratica! Per qualsiasi dubbio o curiosità lasciate un commento qui o sul mio canale Youtube! 


domenica 22 maggio 2016

Apple green ancient Roman tunic and palla

As you could read in my previous post, I sewn a new ancient Roman outfit for an historical event in Rome. To be honest I didn't need a new outfit since my last tunic was just from 2015 but the group asked me to bring a second pair of clothes in case of bad weather. 
So I went to my local fabric store to look for nice fabrics to use; the emerald cotton I liked was too expensive and I didn't want to spend lot of money for a dress I already own (so silk and linen were absolutely out of budget) but I had to be historically accurate at the same time. Luckily cotton was widespread during the Roman empire (good for my pockets) so I bought this nice light green and apple green fabrics. The lighter one was chosen for the tunic and the brighter one for the palla. 

The dress had the same construction of the previous outfit (so nothing new under the sun) and I recorded a speeded video to show you the various steps of the sewing process; since I had to keep it accurate I did every hem and outer details exclusively by hand. The tunic has been fastened with two bronze buttons and fastened at the waist with a leather belt (not displayed in the following photos).


I hand sewn the eyelets of the headband as well. The palla has been made out of 3 metres of cotton, all hemmed by hand (what a work!) but in the end I managed to finish the whole outfit in less than a week. 
Since the palla was really long I could wear it in two ways: wrapped around the body or worn as shawl draping it around shoulders and on the head. 


The only problem I got when wearing it as veil was the weight; the veil pulled the headband away so I had to keep it light and not tight as shown in the picture. The tunic is really comfortable and fresh, in the photos I worn a white extra layer since the weather was kinda cold. 


I took two videos for my Instagram profile showing the costume in action: 


I simply love how the palla falls around the body and how it looks on my skin! 
A made to order version of this costume is listed on my Etsy shop: give it a visit! 


martedì 19 gennaio 2016

A medieval-fantasy gown: Eowyn

Do you remember the green and gold velvet gown worn by Eowyn in "The Two Towers"? The movie came out in 2002 and since then I've been a huge fan of that dress. It looks soooo medieval, with the long hanging sleeves and the beautiful gold details...a dream! I never had enough budget to buy a replica of the costume so - ta-dah! - I bought a commercial pattern to sew my own version. The pattern still lays in its envelope due to lack of time but I managed to sew a very personal version of the costume with matching colours but a different design. 


For this costume I used a beautiful emerald green crushed velvet as main fabric and gold satin for the contrasting panel and the lining of hood and sleeves. I'm not a fan of poly satin 'cause it frays a lot and it's looks really cheap but you know - budget is budget. To my customers I recommend to choose taffeta, which has a richer texture than satin and looks less fancy.
The dress design is a classic: a medieval-fantasy dress with hood and square neckline, with front and back lacing. Nothing new but this is the kind of dresses which fits me at best and I love to make. 
The lacing is made of fabric eyelets and satin ribbon. To hide the arm seam I hand sewn a piece of gold trim. 


The dress is really comfortable and the lacing allows a perfect fitting. I enjoyed a lot these photos in the woods - the beautiful necklace I'm wearing is by Aeternum Nocturne Jewellery
The hood is wide and covers the head like a glove, falling on the shoulders when not worn. The satin lining falls nicely on the skin and I love how it turns on the outside when the arms are left in a lower position. The crushed velvet is so bright and follows the curves of the body, a blessing for ladies who have large hips like me. 

Some professional photos:


This costume is listed on my Etsy shop and can be ordered in different sizes and colours. Feel free to leave a comment if you have questions about! 


martedì 24 novembre 2015

Sewing an ancient Roman dress: a short tutorial.

If you had the chance to read my entries for a while, you should have noticed I'm an ancient Roman reenactor and fanatic. I studied Roman History at University and since then I'm totally crazy about that. As reenactor I need to have accurate outfits to be worn during events and as seamstress I love to take care of the details. 
Sewing an ancient Roman dress is not difficult but requires a little bit of historical research. I wrote about Roman fashion in the past and I don't wanna repeat myself, so I hope you'll enjoy this short summary. The basic garments of an ancient Roman woman were three layers, a tunic, a stola (if married) and a palla, an outer garment which was worn in public by respectable women and could be carried on the head as veil. The tunic, as you can imagine, was the foundation of their wardrobe. 
Building a Roman tunic is not hard, there are several images and tutorials on the web but be careful, most of them talk about the ancient Greek fashion, which is similar but not the same thing. Forget the lascivious costumes worn in movies and fictions, Roman women were more modest you can think! 

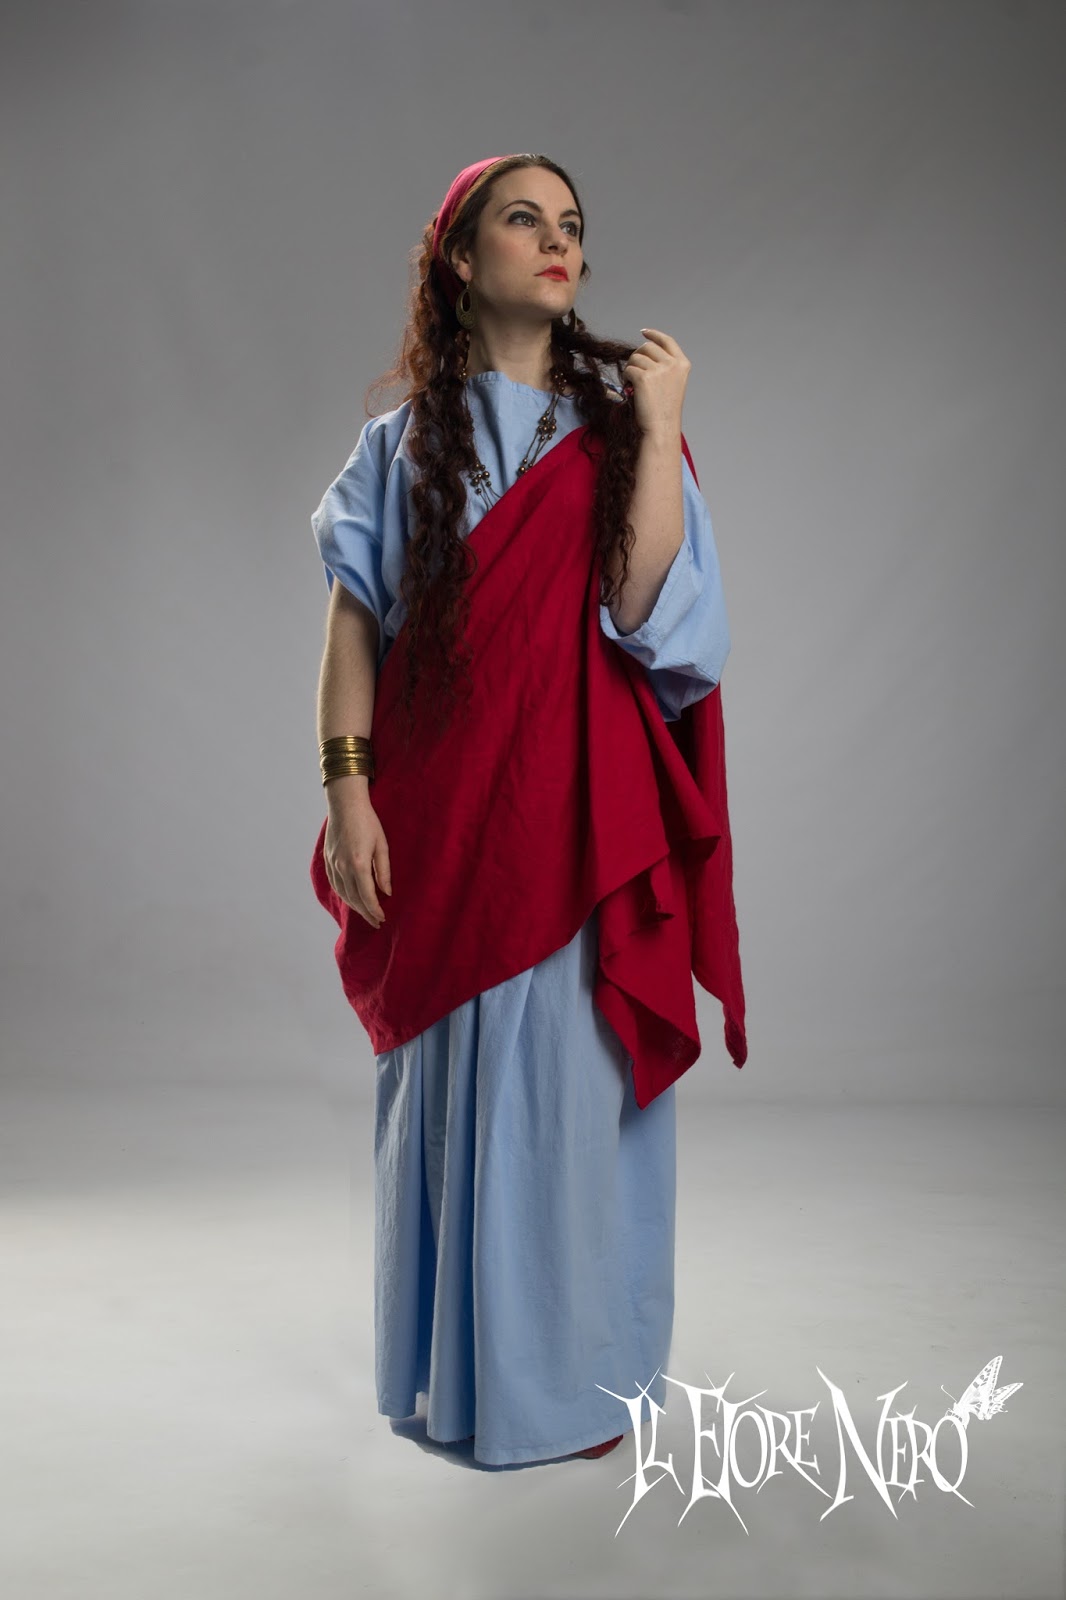
So, for the last event in Acqui Terme I needed a new and more historically accurate outfit, which included a palla and a veil. I was out of budget so I couldn't sew a stola, but it's ok if you wanna portrait a young and unmarried woman (smart solution!). I wore the outfit again last week for a nice shooting with the guys of Light&ART studio. 

Before talking about the construction, let's see some references: 


The most accurate form of tunic is a wide, long, rectangle of cloth which is sewn at sides and open above, to let your head and arms get out. It looks simple, uh? The tunic was draped around the body with a long belt, which was tied under the bust before and around the waist later, giving the dress the classical puffy shape. Ancient roman fashion didn't have supporting garments as corsets so the belt under the bust is a help to keep everything in place. To obtain this famous shape you need a long tunic, almost the double of your height from shoulders to feet. 
So, after determining the height of your tunic all you have to do is sew at sides, from selvage to selvage. Here there's a scheme for the ionic chiton, but the process is the same: 


You should have at this point something like this: 


Once you're done you have to wear the tunic and mark your fastenings with the help of a friend. An accurate solution would be pins to close your sleeves but I went for some decorative buttons. My tunic has been dyed in light blue but you can choose other colours. Don't leave it white! When your tunic is fastened you can proceed with the belt (a piece of cord or a braid would be perfect). The palla was the equivalent of male toga, so sew a continuous piece of fabric of oval shape; my palla is in red linen and matches my hair band. 

To give you an idea of the finished outfit, look at the following photos or read my previous entry about Acqui & Sapori (there are other photos of the costume in action). For my tunic I sewn all hems by hand, this decision it's up to you. 


The veil is a small rectangle of fabric handsewn to a hair comb. Even in this case, I sewn all hems by hand. The hairstyle will help you to keep the veil up so it's important to choose a lightweight fabric. For the hairstyle you can use bobby pins or - more accurate - wooden forks. A tip for your hair: curls, curls  and more curls! Use extensions if your natural hair are not long enough, Roman women did the same with real human hair or wigs. 

Photo by Raffaele Boni Photographer

 The whole outfit was finally completed with lot of jewels - bronze, gold or silver are acceptable materials. If you have some questions about this kind of costume, leave a comment!
venerdì 18 settembre 2015

Tutorial: convertire una gonna in un maxidress!

Oggi un tutorial di cucito facile-facile! 
Avete presente la sensazione di dover acquistare a tutti i costi quella gonna perché vi fa impazzire, anche se vi arriva sotto ai piedi? Ebbene, è ciò che è successo a me qualche anno fa, con questa gonna. Adoro da sempre le cose plissettate (assieme ai fiori, la fantasia mimetica, ai pois e moltissime altre cose...) e quando l'ho vista non ho saputo resistere. Ahimè, la mia taglia di fianchi corrispondeva a una delle misure più grandi e a circa 175 di altezza, ma l'ho comprata lo stesso, fiduciosa di riuscire ad utilizzarla. Con mio sommo rammarico, è rimasta nell'armadio per quasi due anni finché non ho avuto l'ispirazione di convertirla in un maxidress.

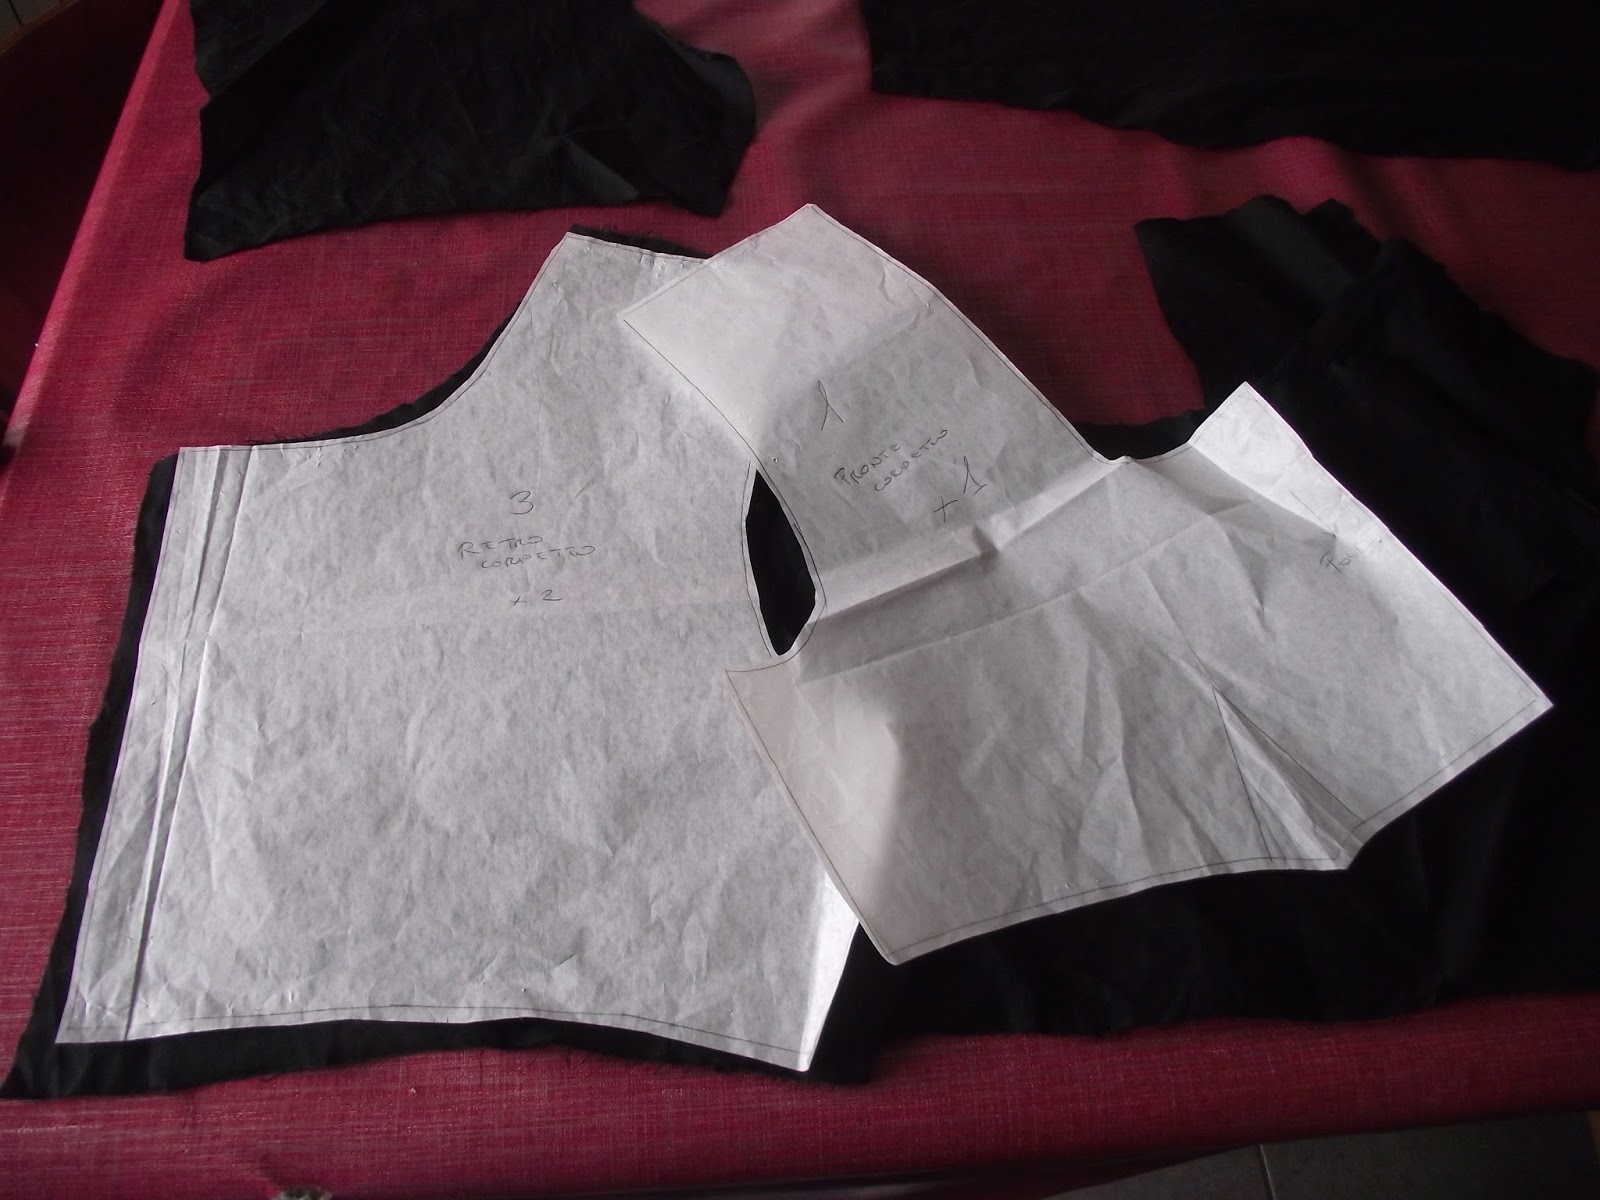
 Il processo è semplicissimo: ho disegnato un top a manica corta da attaccare all'elastico della gonna, che sarebbe così diventato il nuovo punto vita. Ho scelto del semplice cotone nero ma potete utilizzare qualsiasi stoffa vogliate (raso, jersey, lino...). Dopo aver provato il cartamodello sul manichino ho proseguito con il taglio e la rifinitura a tagliacuci. 
Per un effetto più curato vi consiglio di tagliare la parte frontale del corpino sulla piega della stoffa, in modo da evitare una cucitura nel mezzo. Se non avete una taglia e cuci potete rifinire le vostre cuciture con il punto zigzag oppure, per un risultato più pulito, una cucitura alla francese (di cosa si tratta? E' un sistema un po' laborioso ma davvero facile: cucite i vostri pezzi di stoffa dal dritto, quindi al contrario di come fate di solito, poi rifinite con le forbici la cucitura ottenuta e stirate, ripiegando il tutto al rovescio; a questo punto, cucite nuovamente e rivoltate tutto dal dritto: la nuova cucitura avrà inglobato quella precedente e avrete un lavoro pulito, ordinato e dall'aspetto più professionale! In poche parole, la cucitura del rovescio si "mangia" quella eseguita sul dritto e quando osservate il capo a rovescio non avrete fili sfilacciati che pendono dalle vostre cuciture). La quarta opzione è quella di foderare il tutto, processo che eseguivo in quasi ogni progetto prima di acquistare la mia tagliacuci (Il solo pensiero di applicare una fodera vi spaventa? Tranquille, ci va solo un po' di pratica e pazienza ma vi assicuro che il risultato merita!). 


Ho cucito le pinces all'altezza del seno e ho rifinito i bordi con del nastro sbieco nero in cotone, nella variante più piccola. Sul retro ho poi applicato una zip per poterla indossare più facilmente. Per applicare la zip ci sono diverse tecniche, il mio consiglio è di scegliere quella più adatta alle vostre capacità e di usare sempre l'apposito piedino.
La parte più difficile è stata calcolare l'ampiezza esatta del corpino in modo che combaciasse perfettamente con l'elastico della gonna, che deve restare invariato. Vi suggerisco di prendere bene le misure prima di inserire la zip; potrebbe essere necessario effettuare delle modifiche sul retro del vostro top e una volta tagliato...non si torna indietro. 
Come ultimo step, ho cucito il corpino all'elastico con uno zigzag per mantenere una certa elasticità. 


A questo punto, potete indossare il vostro nuovo abito e decorare il corpino come più vi piace. Facile no? Avete un nuovo capo nel guardaroba e non avete dovuto spendere altri soldi per farlo accorciare! ;)


Ed eccomi con l'abito indossato: lo abbino ad una cintura elasticizzata per un tocco più elegante.

Se il tutorial vi è piaciuto e/o l'avete trovato utile, lasciate un commento! 


venerdì 6 marzo 2015

Tudor court gown "Queen Anne"

It took me a month and a half to finish it but - tadah!! - now it's complete!
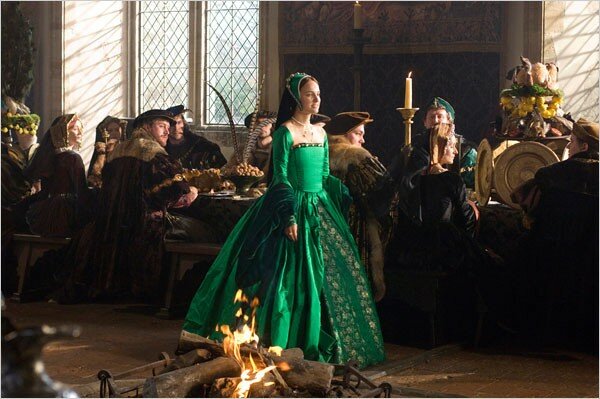
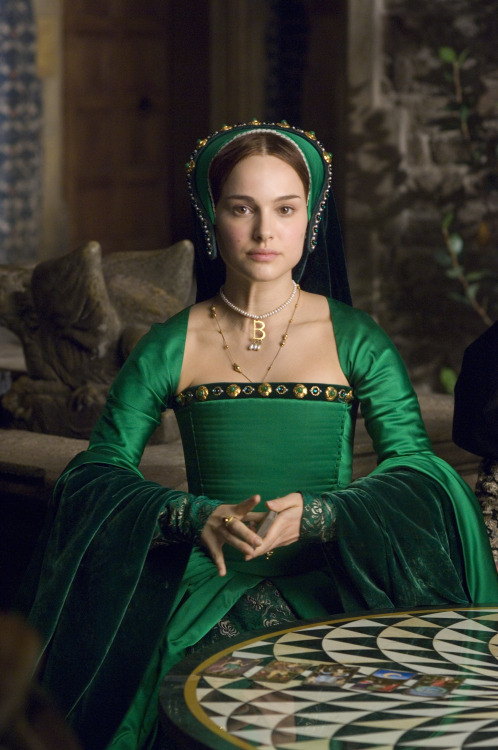
I was planning to sew a new Tudor costume inspired by "The other Boleyn girl" from last summer, after watching the movie for the first time (ok, the movie came out in 2008 but you know I'm NOT a big fan of cinemas so I watch movies really late). Ok, they're inaccurate, but some details are really pretty. I fell in love with Mary Boleyn red gown and I used it as reference for my first Tudor costume (read here the last part of the construction diaries and some updates) but how can I ignore the amazing green dress worn by Anne during this scene?


The emerald green is simply stunning and matches perfectly Natalie Portman's dark hair. I had to wait until last January to start collecting fabrics for my own project 'cause I had previous costumes to finish and my trip to Rome took me a whole week in December. So, with the new year, I've been able to start my project: I immediately realized I couldn't reproduce a perfect replica of the dress due to my budget but I tried to be the most accurate as possible. I bought at my local market a beautiful silk taffeta at a very cheap price and for the gown, black lining, spiral steel boning for the bodice, heavy cotton for bodice interlining, white pearls. I already had in my stash the black satin for the veil of the french hood, the green cotton for the contrasting sleeves and the golden cotton satin for underskirt and foresleeves. This time I wanted a more accurate dress so I decided to use the Tudor Tailor book which contains a truly historical accurate pattern for french gowns. I had lot of fun in resizing the pattern and it looked good as I put it on the dressform. 


 The whole construction of the dress took me a lot. The silk taffeta was really delicate and I had to be really careful to avoid holes in the fabric fibres. I used four panels for the skirt and I left the front without pleats. The bodice is boned with the spiral steels boning and gives me lot of support but - alas - I'll have to shorten it next time (nature hasn't been generous with my breast). The placard is attached to the bodice with small pins and it's embellished with some pearls sewn on black bias tape. The foresleeves are trimmed with black bias tape and golden buttons, attached to the upper sleeves with cotton ribbons. The underskirt is a piece of my first Tudor costume and is trimmed with red bias tape instead of black but this part is not visible when wearing the main gown. It was my first attempt with beading and I've to admit it's not my job.


For the french hood I used a great tutorial provided by Prior Attire. The base is fully wired and lined with green cotton, which doesn't make my head sweat. The crescent is embellished with white pearls onto the bias tape. I had lot of fun in sewing the pleated frill and - okay- it should be between fabric and lining but I forgot this step and I didn't want to rip everything when I realized my mistake. As final touch I added a single thread of small white pearls to hide the stitches. 


Okay, some details are not 100% accurate but I didn't have a huge budget (as usual). It's surely a better costume than my first one from a Simplicity pattern and I'm so proud of that, if you think I started sewing two years ago only :) 
I used this costume this week for a shooting and I can't wait to receive the shots! I just have some backstage previews:

Selfie time! That's me and my boyfriend Lele. 
And the dress in action:


The jewels you can see in these photos are by Aeternum Nocturne from Bulgary and Red Rose Creation from Italy! 


giovedì 20 novembre 2014

XVIII century costume: Marquise

Hello ladies! Today I wanna show my last creation, a rococo' inspired costume :3
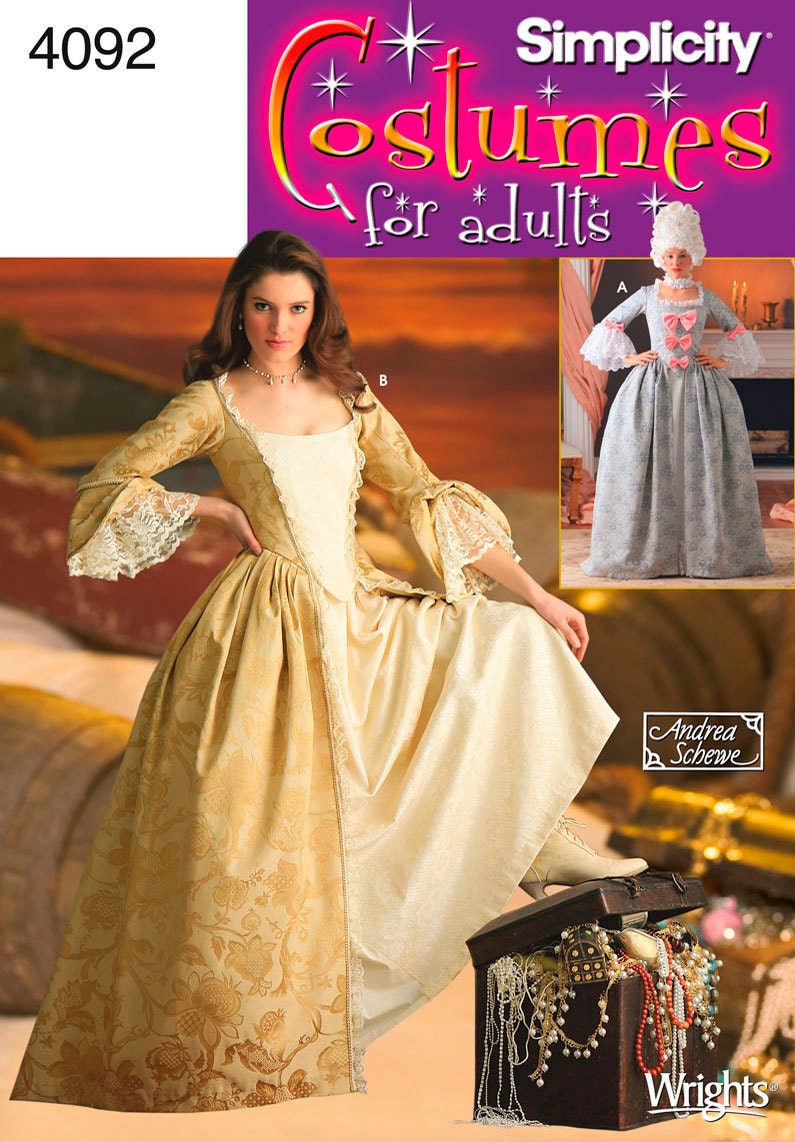
The XVIII century was one of the few historical periods I never met in my modelling life. I've never been a huge fan of panniers and high hairstyles, powder and wigs, but as a beginner costumer I wanna try everything. I found a good offer on Ebay for a Simplicity pattern (number 4092) and I bought it. While doing some research about the pattern on the web I discovered it was released in 2006 when "Pirates of Caribbean" came out; the first model shown on the envelope is a classic XVIII century gown with lace sleeves and decorative ribbons (a simpler version of a robe à la française) while the second one was inspired by the movie itself, and looked easier to make. 


The reviews described the pattern as very good for beginners and I've to admit they were right. I had some problems with the panniers but I'm not good with heapieces and accessories. This dress was the first fully lined and boned costume I ever made and I'm soooo pleased with it! I finished to sew it in a couple of weeks and I would recommend this pattern to every lady who wants to start a rococo' inspired dress. 

The fabrics I chose are midnight blue taffeta and light blue satin. The dress asked for a petticoat but I chose to sew the underskirt and the main dress together (this is not historical accurate). On the back I went for a pair of hidden buttons instead of the zip asked by the pattern. The bodice has been really easy to sew together and I was a little bit frightened by the boning part. I was wrong! My boyfriend helped me to draw the boning channels and I did the rest, using linen as interfacing (so I have 4 layers in my bodice: fabric, lining, linen and lining again). The result is sooo lovely, the central panel falls perfectly and gives a good shape. I used spiral steel boning for this project and since the dress fits me quite fitted (I used a size 8 instead of a 10, the pattern runs large) I avoided to add extra boning except the central panel. 
The second step has been the lining. Lot of love! The dress falls on the body like a feather and the inside of the garment looks so professional. 


After sewing the lining to the bodice I stitched by hand this beautiful blue organza trim along the whole neckline. 


Then I started to decorate the bodice attaching the sleeves and this beautiful ivory lace. 


The skirt has been very easy to sew; I pleated it instead of gathering it and I'm so satisfied of the result. This is how the dress looks without the panniers: 


I started sewing the panniers in a second moment, when I saw the dress looked so "empty" without a proper underpinning. The problem with the panniers is the back: the dress doesn't hang straight on my hips (it's obvious, this model wasn't designed for panniers) and so the back looks quite big. For the panniers I bought two metres of natural/ivory linen and white bias tape as boning channels: 


These are the several layers of the dress. I use a burgundy taffeta petticoat to hide everything. 


.  My bf took some detailed photos with his Reflex to show you some details:


That's the dress in action during a shooting: 


For this dress I spent less then 100€: the fabric costed around 60€, the lace was really cheap and I already had at home the blue satin ribbons I wear around the elbows. The choker has been done by my own, it was an old strip of black lace hidden in my sewing basket from ages. And you? Did you sew a Georgian dress as well? Show me your work! 

Post in evidenza

Edwardian skirt and blouse, circa 1900-1905

I've always been fascinated by the style of early Edwardian era, with those lightweight blouses, fabrics, delicate laces and floating s...