venerdì 14 ottobre 2016

Cotton Regency dress: the blue dress from MoMu

Updates at 10/10/2016: I finished this dress, at last! It turned out beautifully. I added a black linen sash to make it more accurate. I wore it last Sunday during a Napoleonic event in Stupinigi and it was a success: it was warm (the day was cold and almost rainy), comfortable and bright! Despite being a day dress is was really colorful and the public noticed it in the crowd.
Below, here we have some photos of the finished dress.

More photos of the event will come in the next weeks!


Hi everyone! I've been so busy in the past month I couldn't write new posts BUT we have something new to talk about. Lot of things happened here so let's get started. 
A local group invited me to join a Regency event and I was really enthusiast since I didn't have new events planned for the season. Despite this I immediately realized I had to work hard to prepare a good outfit that had to be easy to sew, fast to finish, good looking and, obviously, historically accurate. A challenge, but I could do that.
I'm new into Regency costuming so I had to do lot of research before starting to think to my own garment. I had a nice blue cotton in my stash so I decided to save money and use what I already have; I spent several hours on Pinterest looking at extant gowns and faithful reproduction and I immediately fell in love with this blue silk dress from MOMU in Antwerpen. 


The caption states the dress is dated from 1800 to 1805 with cotton and linen parts. Unfortunately I couldn't translate the rest.  

I had everything, the same shade of blue for the dress and lightweight white cotton for the fichu so I didn't waste my time and started to work on that. I wanted my dress to be simple and versatile so I decided to use drawstrings as closure instead of buttons (you can find a good article about Regency dresses closures on Historical Sewing). I drafted the pattern by myself using my Simplicity pattern #8399 as reference. You could ask why I used a Titanic (so Edwardian) inspired pattern to make a Regency dress. Well, the answer is simple: the Titanic inspired pattern has more a Regency line than a slender, Edwardian look, and you can figure it out just looking at bodice and skirt pattern. The skirt is really puff at the back while it should be tighter and without fullness. 


I used two pieces for the bodice and skirt. Since I don't like short sleeved dresses I drafted my sleeves to be elbow length. The bodice is lined in cotton with contrasting blue piping at side seams; the lining has been stitched to the skirt seam for a neat finishing on the inside. I sewn the drawstring channel by hand using blue bias tape and simple running stitches. The skirt is hand gathered at waist at front and back.
The curved sleeves of the original dress are typical of the late 18th century; mine are straight and reach the mid of my forearm. 


I used a temporary sash with bias tape. 
Every hem has been hand sewn for an accurate look. The fichu is made of white cotton and is entirely hand sewn with slip-stitches. 

The dress was finished in a couple of days (I would say 3) but being in July I faced the truth: my cotton was too heavy to be worn in the summer heat (the event was on July 31st...) with chemise, petticoat and stays underneath. I was really disappointed but I preferred to save my health and go to shop for another fabric. So sad...

sabato 8 ottobre 2016

Claire Fraser blue jacket and skirt from "Outlander"

To be honest, I'm not a great fan of cosplay. I prefer historical costumes or historical inspired fashion with personal touches, recreating a costumes as-it-is is not for me. I always have to add my touch to a creation but you know, I don't  make the rules.
With the increasing demand for Outlander costumes I have to change my point of view a little. I started to watch the show some months ago and I fell in love with the amazing and wild Scottish locations; the costumes are great (even if not so accurate) so I decided to sew some quite close replicas for my Etsy shop
I start with one of Claire's simple outfits, the blue jacket with stomacher and skirt. 


My version:


The show is set in 1740's so you can see boned stomachers, stays and bum rolls all around. My version is made of midnight blue linen with cotton lining, boned linen stomacher and lacing rings on the front. The jacket ends with a waist seam and two small skirts just above the hips. They make a really nice figure when worn with proper underwear. 
The skirt is really simple, with a pleated front and back and slits at sides (so you can reach easily your hanging pockets or pockets hoops underneath). 


This one was made for a customer, so I still have to create a version for me (I prefer the brown jacket shown in a couple of episodes). I also did another version without waist seams and elongated jacket skirts but I find it less elegant so I don't think I'll offer it again. I also omitted the sleeve lining for fitting reasons. It's not a big issues since you're supposed to wear a chemise underneath. 


 And the brown jacket I totally love, without jacket skirts and waist seam:


All these items are listed on my Etsy shop and are available in different sizes and colours. Take a look! 


martedì 20 settembre 2016

A Regency day in Osasco: dress and undergarments

If you followed me for a while, you may know I'm kinda new to 18th century and Regency costuming. Being definitely not what you can consider a tall lady, I've never been a huge fan of high waistlines and raised breasts because I considered them bad looking on me. I was wrong. Really wrong. My perception of Regency era simply mislead by movies, period dramas and lack of knowledge. Being honest and admit your limits is the first step to open your eyes and start studying seriously a certain historical period and fashion. 

Period dramas and so on forced the public to think Regency fashion was something delicate, extremely feminine and with a great freedom of movement given by the lack of corsets, heavy undergarments and underpinnings such as panniers or pocket hoops. Many ladies I know who sewn a Regency dress think the same but this is partially true. Regency women WORE corsets, even if they were surely more comfortable and less constrictive than their predecessors. They wore several layers too, such as chemises, petticoats, chemisettes and so on. 
So, after making my own and serious researches I radically changed my point of view about Regency costuming; those dresses looked bad on me because of the lack of proper undergarments. That's all. You don't need to be tall to look good in your historical outfit.

After all these considerations, I can (finally) tell you something more about my first Regency event. Two months ago (ok, I'm a little bit late!) I was invited by Le vie del tempo to join one of their events at Osasco castle; I didn't have an early 19th century wardrobe so I had to sew or purchase everything. I mean...everything. The only thing I had was a pair of flat shoes. Sounds great, uh?

I started with a bodiced petticoat. Since we were at the end of July I decided to skip the chemise to survive the italian summer heat (I failed) and I drafted the pattern for my bodiced petticoat in a while; it's a basic top with a gathered skirt at the underbust with hooks and eyes at the back. I used some cotton in my stash and I sewn the hems with a basic running stitch. The garment when together easily and without surprises. Phew!! 
Then the corset or - better - the short stays. They're made of two layers of cotton with plastic boning and metal grommets, not accurate but I was out of time and on a budget. I drafted my own pattern and since I'm not busty I avoided the gussets. 

Bodiced petticoat with pinned stays

Now the fun part - the dress! I originally planned to make a blue cotton dress but the cotton I had was too heavy to be worn at the end of July (and still is...) so I run to the fabric store to look for a lighter fabric. I ended to buy the same fabric of my Ancient Roman green tunic with some extra satin piping for the back seams. 
Ta-dah!

I wanted a drawstring dress but my bodice wasn't big enough to be gathered; after consulting Historical Sewing again about Regency dresses closures, I went for buttons at the back. I put piping at side back seams and between puff and lover sleeve but adding it to the neckline has been a mistake. The neckline became too heavy and large for my bust and needed to be filled with a fichu. 


I don't have nothing new to say about the construction; the dress is made of a 5 pieces bodice and a two pieces skirt partially gathered. That's all. For a fuller skirt, just add another panel and you're done. 
I have larger biceps than an average woman of my size so I wanted to hide them with long sleeves. A mistake, again. But they were really nice. 

Here you can see how the gathers look. I love how the piping came out! 


The ladies from the group especially loved the braided hairstyle my boyfriend made me that morning. 


Indeed he really did a great job! 

Some photos from the event:


mercoledì 14 settembre 2016

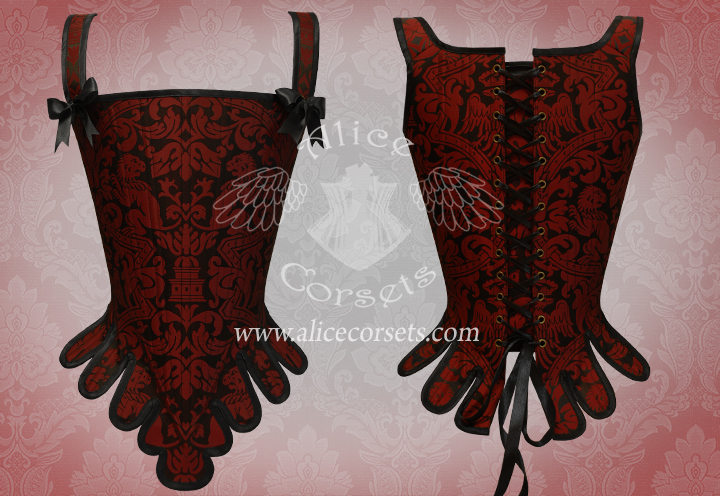
1780 Half boned stays in linen

So, it seems  I'll spend this year sewing 18th century costumes! Whoa! 
Due to the high demand of Outlander reproductions I considered the idea to set some corsets for the public. I'm not a corset maker but 18th century stays are really attractive and easier to draft so I accepted the challenge. 

If compared to my previous Diderot stays, this one is less boned but it's better constructed. It is made of three layers (linen, cotton canvas and cotton for the lining) with hand sewn cotton bias tape (no more poly satin here!) and metal grommets. I wanted to set hand sewn eyelets as default option but the price would have been too high - so customers can choose. 

The corset is made of burgundy linen (I had enough in my stash) and I used as reference an extant corset from V&A musem dated about 1770-1790. My version has separated straps to be easily adjusted to the figure and no contrasting tape on seams, plus I went for front lacing to put it on by my own.


Detail of the binding

The corset has spiral lacing with satin ribbon. It is really supportive and doesn't tighten the waist as some Victorian monsters I wore in the past; the gap in the center front is period correct. I used zip ties as boning as suggested by many historical costumers. As usual, binding the tabs took most of the working process.
The low neckline is made to accommodate cleavage and to support the bust, pushing it upwards.  

I didn't take so much photos of the building process but it went together really easily and nicely. 
These stays are listed on my Etsy shop and are available in 7 standard sizes and in multiple colours.
Let me know what do you think! 


sabato 18 giugno 2016

1776 stays from Norah Waugh "Corsets and Crinolines"

I'm new into 18th century costuming and despite some inspired costumes, I never sewn an accurate outfit. This year I'll attend some Georgian events and I definitely need to create something historically accurate. I'm not a great fan of the luxury gowns of 1750-60s so I chose to reproduce a simple - but elegant as well - robe à l'anglaise. Before getting started with the dress which is actually still in my mind, I needed to sew proper underpinnings. Remember: you can't have the right look or the desired historical figure without the proper underwear; there's a reason if they wore that stuff. You cannot have the fashionable conical shape of 18th century if you don't wear stays (the early word for corsets) and this works for other centuries. So, let's get started. 

The first step were the stays. Stays. What a strange word, uh? Basically, stays are a supportive garment that helped women to get the desired conical shape. They're completely different from the Victorian corsets we have in mind but I'm sure you already met some of them in their modern look: 


The stays were studied to hug the torso pushing your breast up while sitting on your natural waistline, and they weren't used to reduce the waist as in the following century (this is very important). Stays could have shoulder straps or not, they could be fully boned (early stays) or half boned (later stays) but all of them had a center busk made of steel or wood and tabs. What are tabs? Tabs are all that little things at the end of your stays which were boned but we'll talk about that later. The stays could be front laced or back laced, according to your social status (a poorer woman without a maid would have worn stays with front lacing to lace herself by her own) and the eyelets were always hand sewn since metal grommets appeared in 19th century. The accurate option for lacing them is with spiral lacing, which can sounds scary but I assure you it's not to hard to learn. 


My finished stays with the chemise. 

Stays have a simple construction. Two - or three - layers of fabric stitched together to form boning channels and other two layers as lining and fashion fabric. Sounds easy, right? 
For my stays I used the 1776 pattern by Diderot featured in "Corsets and Crinolines" by Norah Waugh. I scaled the pattern in Photoshop and then I printed it out; I immediately noticed the design was really big for me (my measurements are 85/78/102 - not an easy combination) so I had to scale it again drafting the pattern by my own. The hardest step were the boning channels: I had to change their position trying to not afflict the functionality of the corset but thanks to American Duchess, I learned there's not a standard position for boning channels, you can experiment with them! I strongly recommend to visit her blog, she's an incredible talented lady and her tutorials are so helpful when approaching to 18th/19th century costuming (another great resource is Prior Attire, visit her as well!) I don't need lot of support since I'm not a busty lady so I skipped the horizontal boning channels. I used heavy white cotton as fashion fabric, black cotton canvas interlining and soft cotton for the lining.


Toile of the back with inserted boning. 

After the first toile I was extremely happy to discover the back fitted perfectly (as shown in the picture). The front was bigger and the neckline was too high and reshaping them took a while. Then I started to sew the boning channels on the back; remember to leave extra fabric on your fashion fabric 'cause this will be faced inwards when attaching the lining. I used a combination of cable ties (yes...cable ties!) and synthetic whalebone as boning. 

Sewing the boning channels on the front took me a while. I didn't own a busk so I added four boning on the front to add support. Here you can see how the tabs were boned. 


After this step I sewn the lining. I didn't take photos of this step since I sewn it as usual. Then the binding. I know many talented costumers that manage to sew the lower binding by machine but I'm not so skilled - so I used my hands. Believe, binding the tabs is a nightmare. It requires practice, patience and...time. Lot of time. I finish to binding my stays in a day or two - or even more. I used satin binding - not accurate but it was the only bias tape I had in stock in huge quantities.


Now the eyelets. I did them by hand. I find it extremely relaxing. I love this step 'cause I can see how I get better eyelet after eyelet. I used an awl to pierce gently the fabric and then I sewn a little circle (a temporary fabric marker is really helpful). Some costumers use covered metal grommets but I find this step quite uncomfortable. 
After sewing the eyelets I worked on the shoulder straps. They had to be shorter to be honest but this was my first pair of stays and I needed to practice. They close with a satin ribbon and a hand-sewn eyelet. The displayed chemise is made of white cotton with hand sewn hems and the pattern is self drafted; I'm not used to low necklines so wearing the shift makes me feel so weird. 

Now the first fittings with the half finished stays:


The whole process took me more than two  months. You know, commissions have to be finished first and I'm not a good corset maker. However, I learned a lot from this project and stays fitting so now I know which mistakes I have to avoid next time. Feel free to follow me on my Instagram profile and Facebook page for more photos, thanks for reading! 

giovedì 9 giugno 2016

Fotolibro by Saal Digital

Il mese scorso ho esposto alcuni dei miei costumi dal vivo, durante una manifestazione. In piena fase preparatoria, ho iniziato a pensare all'allestimento; volevo qualcosa di semplice, intuitivo, ma che potesse suscitare l'interesse del pubblico (ovviamente i manichini avrebbero avuto il ruolo chiave in tutto ciò). Tra tutte le varie idee (dépliant, volantini, foto stampate e via dicendo), mi è venuto in mente di far realizzare un fotolibro in modo da avere raccolti i vari costumi realizzati e permettere al pubblico di "sfogliarli" comodamente.


Ho iniziato a cercare online, selezionando varie offerte, finché non mi hanno suggerito di provare Saal Digital. Ho avuto modo di toccare con mano la qualità dei loro prodotti, sfogliando uno dei loro fotolibri. La qualità di stampa è davvero ottimale, le immagini sono chiare e nitide, il tutto è corredato da una bella copertina rigida che conferisce professionalità al vostro prodotto.  Per questioni divulgative ho preferito ridurre le foto per dar spazio ad un minimo di didascalia, includendo spiegazioni dettagliate su periodo storico trattato, materiali e tecniche utilizzate.


L'ordine degli abiti è cronologico, partendo dall'Antica Roma per giungere agli albori del XX° secolo. Il retro copertina mostra un mio scatto in stile preraffaellita, nel quale indosso un abito in velluto bordeaux decorato con pizzo nero. 
Il pubblico ha apprezzato molto la qualità delle immagini e le spiegazioni fornite nelle didascalie, ponendo domande e mostrandosi incuriosito. La qualità del prodotto è assolutamente ottima e indiscutibile, corredato da un software un po' macchinoso ma alla portata di tutti. Consigliato! 
Se desiderate ordinare il vostro fotolibro, visitate il loro sito web o la relativa pagina Facebook. 


venerdì 3 giugno 2016

IX century Anglosaxon - Norman dress

I have several sewing projects for this year, including a bunch of medieval dresses. My last medieval dress was from 2014 (the burgundy Bliaut) so I thought it was time to create something new. I always had a passion for the lines and shapes of early medieval fashion so first of all I did a little bit of research to understand how these dresses were made and cut.
The fashion of this period was not so advanced and the influence of the roman empire is still visible when looking at the cutting diagram: the dresses were cut following simple shapes, often squares, rectangles or semi-circular, and they were studied to save most fabric as possible. Women's fashion of 11th century featured two basic garments: an under dress with fitted sleeves and a knee length super tunic, including a oval veil to cover the hair. This kind of fashion works perfect for the late Anglo-Saxon period and the early Norman kingdom. 


I chose brown and ivory linen for my project. I wanted something simple and practical, something completely different from my other dresses; the medium weight linen worked great for this purpose: it gives a "everyday" look and the simple linen trims add that touch of elegance perfect for lower-middle classes. 
The tunic fits like a glove and it's really comfortable. The sleeves are faced inwards and there's no visible machine stitching from the outside. The super tunic falls gently on the body and looks great with or without belt; the neckline is faced outwards and every hem has been hand sewn with cotton thread and medium sized stitches. The skirts float so nicely together when moving!


The faced neckline

The veil was a challenge. It was really easy to be made (all hand sewn) but wearing it has been more difficult. I had to make several fittings before finding a nice way to drape it over the shoulders, the secret is to put the longest part of the veil on the head and then wearing a leather or metal crown to keep it secured on the head; the shorter part needs to be draped on the shoulders or tucked behind the neck. The important is to hide the hair completely and - very important - the ears: this might sound strange but covering the ears was not only a sign of modesty but a way to protect women from...pregnancies (during Middle Ages it was widely believed the Virgin Mary was inseminated by the Holy Spirit through her ear).


A version of the dress without all the trim

To complete the outfit I sewn a white under dress in fine lightweight linen as well. This piece has a modern construction on the inside but the outer elements have been all hand sewn.
I'm often asked if chemise (or shifts) are important when recreating an historical garment; the answer is yes, absolutely. Chemises/shifts/under dresses are the foundation of an accurate, well-made garment and they make the difference. First of all, they are the foundation of your wardrobe as you lived in this garment; people was supposed to own a bunch of these which were frequently washed,. They lived in an era when human bathing was not frequent. The chemise helped you to protect not only your body but your outer clothes too (often more expensive), acting as a barrier and keeping them clean from dirt and body oils. So yeah, when purchasing/sewing an historical outfit please don't forget to add a chemise as basic undergarment.  


And so here I am, wearing the whole outfit during my latest costume exhibition :)


The items are listed on our Etsy shop and are available in three different standard sizes (S, M, L).
Thanks for reading!


Post in evidenza

Edwardian skirt and blouse, circa 1900-1905

I've always been fascinated by the style of early Edwardian era, with those lightweight blouses, fabrics, delicate laces and floating s...