venerdì 3 marzo 2017

1790s dress plans: some inspirations!

Spring is approaching fast, so do the Directoire events my group (Le vie del Tempo) has confirmed! I literally can't wait because the last decade of 18th century has always been my favourite. I'm planning several outfits (there will be numerous events throughout the spring and summer) so I need at least a dress and a jacket. Instagram fellows probably already read I'm going to reproduce the stripey jacket from Kyoto Costume Institute but we'll talk about this project in a second moment (I'm still waiting for the fabric to come); for the moment, I'm planning to make a simple, fresh, easy to make gaulle or round gown. 
I fell in love with the dress displayed in the danish museum and download the pattern they provide months ago. I studied it a little (knowing German has been extremely helpful in translation the pattern directions since they're in danish!) and guess what? It has almost my exact measurements! Squee! This means I only have to do a toile, minor alterations and I will be done. I'd like to use my Ikea curtain fabric for this project but I'm not sure, since white plain cotton would work fine too. I'll make this dress for sure, obviously in white, but for the moment I need to think about that properly. A beautiful open gown would match this dress - maybe in blue. 

I'm pretty sure you already saw this beauty! 

The second option would be a robe en chemise, so a late chemise à la reine. I looked at a few portraits of the period and I faced out how to draft the pattern but I cannot get decided about the colour. White or lavender? My boyfriend suggests lavender and I think he's right, I can't make a bunch of white dresses but they're so cute!! 

An example of gaulle dress:
M.me Seriziat by Jacques Louis David, 1795

The beauty of late chemises dresses is they represent a nice example of transitional dresses. They still have the fitted, curved sleeves of 18th century but the front of the dress screams Regency. They look so elegant, so delicate and extremely feminine and I love to be feminine with my costumes! Robes en chemises had a very fitted back as well, as shown in "The Duchess" (2008): look the gathered front, probably closed with a button just above the neckline. Other examples are from "Marie Antoinette" (2006).
As usual, American Duchess did a great costume analysis here: http://blog.americanduchess.com/2010/12/costume-analytics-emilie-seriziats.html

The Duchess


Marie Antoinette

And that's all for now! Do you have any suggestions? I'd like to hear your opinion!
Oh, I forgot! Thank you sooo much for the more than 100.000 views on the blog!! It means a lot to me! 


domenica 26 febbraio 2017

18th century pocket hoops

Iconic and easy to make: I'm talking about the famous pocket hoops worn in 18th century!


Beginners or people not involved in historical costuming may find this term strange so let's give some explanation below: pocket hoops were structured undergarments worn in 18th century to support skirts and give volume at sides, as women's fashion of that time asked. They were boned to be supportive and flexible and could be used as small pockets too (as the name suggest); an opening hidden in the skirts allowed the hands to reach the hoops underneath.
Pocket hoops must not be confused with panniers, which were definitely bigger and worn during formal occasions like balls or court events. Pocket hoops were smaller and easier/lighter to wear. 

An example of extant panniers: 

Hoop petticoat or pannier, English, 1750-80. Plain-woven linen and cane, LACMA.


And pocket hoops:


The difference is really clear :)

Now, let's return to my pocket hoops. I drafted them using Norah Waugh pattern in "Corsets and Crinolines" book without big alterations; the beauty of pocket hoops is they don't need to be custom made because they're fitted to the waist with ribbons! Easy, uh? Mine are in cotton but linen can be used too; the only limited is your imagination, taste or stash! 

I boned them with reed for accuracy but also synthetic whalebone or steel boning are good materials to work with. These pocket hoops closes at waist with cotton tapes that run into a casing. 

Side slash opening - hand sewn.


Pocket hoops worn with petticoat 

They turned out really lovely and are a nice addition to my 18th century closet. My first pair of pocket hoops was awful (they were made from a Simplicity pattern...) and they didn't support the figure even if they were strongly boned and made of linen. 

This pair of pocket hoops is listed on my Etsy shop too, give it a visit! 

19th century cotton chemisette

Last Christmas I have been gifted (squee!) with a full series of Regency patterns created by Jeannie of Sense & Sensibility. I came across their website ages ago, when looking for Titanic tea gowns patterns. At that time I didn't sew yet (we're talking about more than 10 years ago!) so I didn't pay too much attention to the full series of patterns they offered but - recently -  I changed my perspective. Usually I try to draft most of my patterns to save money and assure me a great fit (I have a weird body shape with small bust and very wide hips so not every commercial pattern fits me) but since I sew mostly for others, I rarely have the time to drape a customized pattern for myself. So, yeah, sometimes I choose the easiest way using a premade pattern. 
My boyfriend made me the best present ever, purchasing for me a whole series of Regency patterns: this collection includes undergarments, several dresses, purses, embroidery patterns and spencers. Oh my god. You cannot imagine how happy I was, my hands were absolutely scratching while looking at the pattern pieces. I HAD to try them asap! However, I had a very difficult January fighting against a bad ribs inflammation so I couldn't sew or cutting without feeling huge pain: this situation translated in a temporary closed shop on Etsy and a period of relax. I felt kinda down (being self-employed if I don't work I don't get paid...) and during one of these afternoon I decided to challenge my pain sewing a very small piece from these patterns: a chemisette! 

The Regency undergarments pattern includes two chemisettes, one with ruffled collar and another one with a pointed collar. I decided to make the first one with a flat ruffle. I used some sheer cotton I had in my stash plus some satin ribbon to close it. That's all. I made it all by hand excluded the shoulder seams, made by machine with a french seams.


A general overview with the dress on.

The chemisette came together really quickly, it was extremely easy to put together and it took me just a couple of days to be finished. In a normal health status I would have finished it in a day. I decided to avoid buttons or pins so I left the two part of the chemisette open, because there's enough overlap on the front to keep it closed when worn. 

This item is available on my Etsy shop in different standard sizes!  


mercoledì 8 febbraio 2017

5 basic tips to work with velvet (and cousins!)

Velvet. The king of fabrics. Really, velvet is from centuries one of the materials connected to royalty and richness with its soft pile and incredible texture. But - for us dressmakers - how velvet can turn into a nightmare our sewing project? Many times, trust me. It happens to experienced seamstresses too so no worries! In this little guide I'll explain you some tips to work with velvet (and cousins - like crushed or stretch velvet) and 
If you're here, I'm sure you probably faced the problems related to velvet so let's get started.

Crushed/panné velvet

Silk velvet


1. Stay calm.
Sewing with velvet can be hard but it's not impossible. First of all, you must keep in mind you're working with an expensive fabric (as silk) so think twice before cutting. Do all the mock ups you need, take all your time but stay calm. Hurry can be your worst enemy. If you want to serge your velvet make a try on some scraps before proceeding: not every velvet type is serger-friendly. 

2. Forget your iron
Don't miss this step! Your iron can ruin your fabric irremediably. The heat can damage and burn the pile of velvet so use your iron always on the wrong side on the fabric, avoiding to touch it; some steam may be used but be careful to don't touch the pile.


3. Clean your workspace
Velvet doesn't fray easily but it leaves lot of small, fluffy balls. Breathing these balls can be a problem for your health so always keep your vacuum near and clean your working space often. Wearing a mask can be useful too. 

4. Pay attention to nap/pile
This is the  most important step, in my opinion. A garment sewn with two different naps scream homemade (remember: your creations must look handmade and not homemade, these are two different things) but  this mistake can be easily avoided paying a little of attention. The nap is the direction of the pile, which can run up or down; usually, the nap running down gives to the garment a darker, richer tone. There's not a general rule (up or down is the same) but the important is to cut the pieces in the same direction: this may require extra yardage so check out the instructions on your pattern envelope.


5. Hem by hand when possible
Velvet may stretch a little, especially on edges, and it can roll on the inside. This counts especially for crushed and stretch velvet. Hemming your garments by hand is a good solution to control stretching: bias tape could work good for this purpose, using a hemming stitch on the inside. Never leave your hems raw! 

mercoledì 18 gennaio 2017

Notte bianca romana Acqui Terme, 2016

While browsing this blog a couple of days ago, I realized one of the entries dating back to 2016 was missing. I don't know what happened, I'm absolutely sure to have written and published that post, but it seems it has gone lost. That post was about my latest event with IX Regio, which took place in Acqui Terme in June 2016. June. We are in January. I have to write again about an experience from more than 6 months ago, how funny. 

So, let's try to remember. Last year we have been invited to join again the "Notte Bianca Romana" in Acqui Terme. Two months before we attended "Natale di Roma" in Rome and so I absolutely wanted to wear again my green (and brand new) outfit. The weather was really hot and wet so - as I expected - I suffered a lot and spent most of my time sitting at the table waiting for the night to come. Towards the evening we got some clouds (hurray!) so I could stand up a little and enjoy the event. 

I'm not a club person so I don't dance or get out on Saturday night (so much work to do at home!) and I'm not the best person to describe an event like this. But I'll try... The event was in two parts, historical in the afternoon and modern in the night, with all the shops open and so on. I think you should have evenings like this too, "notte bianca" means "white night" in English. Anyway, the group did some reenacting stuff in the afternoon and early evening, including gladiator fights (the guys were wearing the colorful subligaculum I made for them the week before - unfortunately this photos is on my phone). 


The guys from the group built the caupona with real food and drinks plus a little market, including... guess what? Fabrics? I immediately went to check out the products heheh


And this is! We didn't take more photos since we were reenacting - first - and we didn't join the drinking evening after - second.
As usual, I recommend to visit IX Regio page on Facebook to be updated on their events and my own Fb page to follow my costumes and work in progress photos.

PS: a replica of my Roman outfit but in blue has been ordered on Etsy and the customer was absolutely in love with it! Can't wait to see her photos from "Les grand jeux romains" of Nimes!  


mercoledì 14 dicembre 2016

The real life behind social medias

This post is about reality and real life. No, it's not the classic "what's my daily routine" post but something more serious, concerning OUR life as bloggers/costumers/seamstresses/models/human beings. In 2015, Lauren of Wearing History started a challenge called "The myth of perfection" in which she explained with photos how social medias can distort the real "us", because on the web you show to the public what you want. And the public will believe you, because people don't know what's happening behind/before/later that photo or video has been taken. 
Social medias may be a dangerous place. I mean...we all have real lives and social medias are often a way to get relaxed, to escape from reality, a personal place. So we want to show our best: our new fabrics, our new dress, our new shoes, our new house...and so on. People often look fabulous, happy, successful: but what's behind? 

I read several post related to this challenge and I decided to do my own. Ok, it's from 2015. I had to contribute last year and I forgot, as often happens because my life is kinda a mess. Like my flat. So, let's get started! This is my real life behind photos shared on social medias.

I'm often told I always look extremely serious and austere in photos but I'm an outgoing person. Seriously, I can laugh (ask my friends)! But in the years I developed the idea I'm ugly (being bullied at school for years didn't help...) and I look extremely ugly in photos while laughing or not being perfectly posing, so I wanted my "modelling character" to be like this: serious, proud, pretending I'm really self-confident about my appearance. 


This shot was taken for an Italian magazine in 2015. I was literally melting for the hot weather, was wearing chemise and corset and trying to use the hoop as tunnel for the wind. A really nice experience but with a sad epilogue: I slowly left modelling after the magazine came out. My parents ignored it completely. 


Always in 2015, wearing my Anne Boleyn inspired gown at an event. I was so happy with this dress but after the ball the dream became a nightmare: our 18 years old car started to stop every 10 km and we came home after 7 hours (7!!) of journey (my town is just 3 hours from where the event was located). 


A victorian photoshoot taken in a very old house. The day after me and the photographer developed a very bad urticaria which required months of medicines to go away. A terrible experience - but the photos were lovely. I had to sit on that sofa because I didn't get my 1850's hoop-skirt on time. 


A shoot we did for my shop, with a landed camera. Our previous Canon broke in 2015 and we could buy a new one only a couple of months ago. At that moment I didn't know when we would be able to shoot again. Due to the shadows on my face I also look fatter and for a woman that always had weight  problems it's not ok. 

All dressed up for a 18th century event in September. I didn't sleep enough the night before because I couldn't finish the ruffles on time  and got a terrible headache after lunch so that I had to remove hat and hairstyle. The day after, I started to have painful abdominal pains due to the corset. 


First Regency event in July. Literally melting in this cotton dress and feeling quite embarrassed because it was the first event with "Le vie del tempo" and I felt very shy so I ended to spend the day in a corner speaking just few words. I was sure the ladies of the group didn't want to see me again!


In Rome, always this year. I had a terrible headache the days before the event, it was really cold (strange weather to be in April!) and my palla wasn't heavy enough to keep me warm. My face and puffy eyes explains everything. 


Back to 2012/2013, one of the hardest moments of my life. Me and my hubby where jobless and forced to live with my parents; we were hopeless and money less and I couldn't afford to buy new clothes for the photo shoots; I started to left modelling, I didn't have enough money to travel and photographers didn't contact me anymore. This photo has been taken near home on a bicycle path. I was really sad in that period and I barely left my house. 


Feeling fabulous in this pre-raphaelite photoshoot for a calendar in 2014. Some days after I had the most awful experience of my life with some customers. 


Second ante-bellum dress, taken from a Simplicity pattern due to lack of time. The back of the bodice was too long for my body shape and full of wrinkles, the skirt ended to be too long and the I discovered someone laughed at my back because - as costumer - I used a premade pattern instead drafting one by my own. This hurt me a lot. At that time I was working on two time-consuming commissions and hardly had the money to buy this white cotton. I had lot of stress in making this costume, with an old sewing machine and awful buttonholes. I also ruined a armhole with my serger and had to fix the hole by hand. 
Now sewing has become my full-time job: sometimes I DON'T have the time to have lunch breaks properly, I miss things and appointments, no social life at all, I get totally stressed but I didn't allow these bad voices to ruin my life and stopped following my dreams! 

And that is! Hope these captions helped to show you we all have a real life behind our modelling shots, perfect fitting clothes and so on: never, never, forget this and remember successful people always were beginners once! 


venerdì 2 dicembre 2016

1750s wool riding habit from "Patterns of fashion I" by Janet Arnold

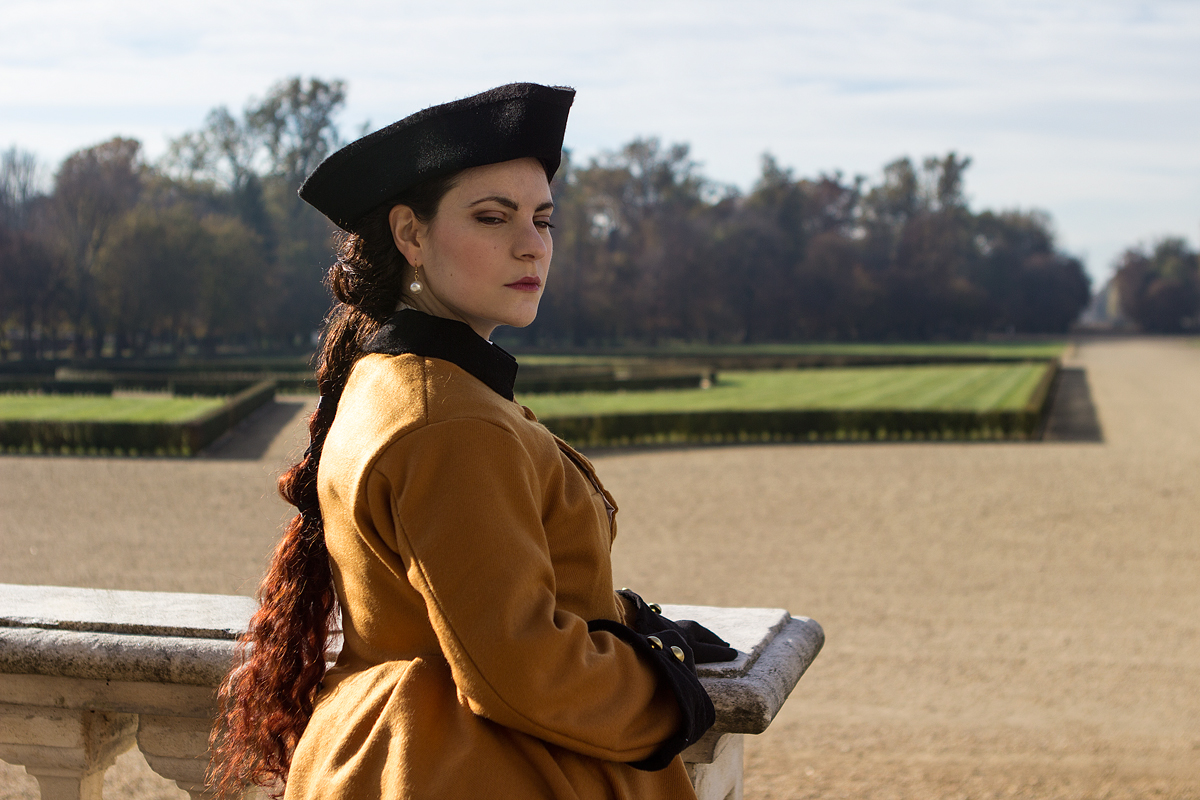
For my latest reenactment event in Stupinigi I had to sew a ridign habit, since the theme of the day was hunting and I didn't own a proper dress. I always loved riding habits from 18 and 19th century so I immediately started to look for references from paintings and extant gowns,
Riding habits were extremely popoular at that time and were also used for walking or travelling, so were versatile; they were inspired by mens fashion so they were often made by tailors following traditional male techniques, as buttonholes on the left side instead on the right. They could be richily decorated or simpler, with long or short skirts, worn open or closed on the bust. Blue and red were popoular and fashionable colours. 


I wanted it in velvet but I thought it would have been too pretentious to be a first riding costume so I went for wool. I didn't have a particoular colour in mind and I chose a pumpink wool I found at a very good price in my home town. I also bought black wool for waistcoat, collar and cuffs. I wanted to look the most accurate as possible so I wore the proper undergarments (chemise, stays, pocket hoops, petticoat and riding shirt) including the riding waistcoat; now the fun part: tailoring. Seriously, tailoring is totally different from regular dressmaking. For my waistcoat I used my Outlander jacket as reference for the main body, enlarging the front pieces and elongating a lot the skirts as seen in "Patterns of Fashion" and "The cut of women's clothes"; the back has lacing as the male waistcoats. It is lined in cotton and it came together really quicly (sadly I didn't take photos of it during the event!) with hand finishing on the outside but machine sewn buttonholes. It was really warm! 

Now the riding habit. The skirt is a classic 18th century skirt made of rectangles with slits at sides and a waistband. I didn't took photos of the construction since I think almost all us know how to make a 18th century skirt properly =) It ended to be longer than I expected so I will have to hem it again in the future. 
The jacket was longer to make. I used Waugh's pattern to start but I definitely abandoned it because I disliked the dropped waist in the back skirts (The Antique Sewist explains this issue in her blog perfectly with lot of photos of the finished garment) so I referred to Janet Arnold. The pattern was kinda easy to draft but I did some alterations in the skirts and omitted the side pockets. The collar is from Waugh's pattern - it was faster to make. 

Janet Arnold pattern

The back and the sleeves fit perfecly but there are some issues with the front. The jacket looks bulky and too long and this is probably due to the position of my old pocket hoops. The front edges of the jacket are reinforced with canvas according to the pattern instructions. 
The pockets and the hems have been stitched with whipstitches on the inside and visible stitiches on the outside to keep lining in place. Cuffs and pockets have been them embellished with gold metallic buttons. 


Et voilà!

I forgot: the book "Patterns of fashion" is available on Amazon and can be purchased here: Patterns of Fashion: 1660-1860

Post in evidenza

Edwardian skirt and blouse, circa 1900-1905

I've always been fascinated by the style of early Edwardian era, with those lightweight blouses, fabrics, delicate laces and floating s...