lunedì 20 ottobre 2014

My Bliaut inspired dress (XII-XIII century)

Hello there!
Today I'm here to talk you about one of my last sewing projects. I was a reenactor years ago and I 've always been in love with the medieval dress for excellence, the Norman "bliaut". It's the typical, feminine, medieval dress with long sleeves and V neckline, the fitted waist and the flattering skirt. This model was very popular during Norman period in Europe, around XI and XII century. 
I never had enough money to buy a good bliaut so I chose to sew one by my own. It's not accurate (as my other costumes) 'cause good historical dresses need lot of money I don't have at the moment. I try to do the best I can with my own resources. 
For my bliaut I used about 4 mt of burgundy linen and 6 mt of embroidered trim. The pattern has been designed by myself, using an old medieval dress which I bought online years ago as reference (very similar to the historical model). I did some variations: my original dress has lacing on the back and I substituted it with a more accurate side lacing with hand-sewn round eyelets. The result is more or less this one (see photo below).
I'm not a great fan of linen (especially if it's not soft) and I try to avoid it every time I can. A good bliaut can be sewn in silk as well for a very noble look but I wanted to give to linen another chance and so I bought it. I found the woven trim at a local market for a very cheap and affordable price. 

After cutting the fabric I pinned both sides and sleeves obtaining this result: 

 photo IMG_20140824_231843_zpsdb29b792.png

 photo IMG_20140825_124645_zps4ed661f1.png


The dress was too tight on the hips for my tastes and so I added the side lacing to adjust it (I'd like to thank my friend Cristiano for his precious suggestion about side lacing! - he saved this project). The solution was simply perfect and the dress fitted me perfectly. So I started adding the trim on sleeves, neckline and hem. I had enough trim enough for a belt too.

 photo IMG_20140828_194310_zps4528cbe6.png

 photo IMG_20140826_165418_zps2cb91c5f.png

Some photos of the finished dress: 


I love, love how it turned out! The sleeves could be more fitted and the skirt wider, but I don't care. I'm planning a matching veil for a more accurate look. 


venerdì 3 ottobre 2014

Raduno multiepocale di gruppi storici alla Cittadella d'Alessandria


Domenica scorsa siamo stati nuovamente ospiti della Nona Regio al Raduno Multiepocale di Alessandria. L'evento, giunto ormai alla terza edizione, si è tenuto alla Cittadella della città racchiudendo un periodo storico vastissimo, dall'antica Roma sino ai soldati napoleonici (non ho visto figuranti di altre epoche, quindi presumo che tutto si fermasse agli albori dell'800). Come lo scorso anno siamo andati a trovare i nostri amici romani, che con la loro ospitalità ci hanno rifatto vivere lo splendore di Roma per un giorno, deliziandoci con nuove spiegazioni relative alla vita quotidiana e non dei nostri antenati. 
Per l'occasione ho sfoggiato l'outfit che mi ero preparata all'inizio della primavera per un altro evento con loro, al quale però mancammo; rispetto allo scorso anno ho curato più i dettagli studiando diverse statue dell'epoca e riproduzioni di altri rievocatori. In aggiunta, sono riuscita a trovare un buon pettinino che non mi strappasse i capelli e reggesse il peso della palla, completando al meglio il look, ma come acconciatura mi sono limitata ad una normalissima treccia. Per quanto riguarda il trucco, ho potuto approfittare di una seduta di makeup romano a dir poco elettrizzante, realizzato dalla domina Amandia Atia Arria, che aveva a disposizione un arsenale molto ben fornito di trucco minerale e filologico, assieme al necessario per realizzarlo (pinzette, bastoncini, specchietto ecc ecc). Per approfondire l'argomento, vi consiglio di visitare il mio post dedicato alla toeletta delle donne romane: http://daniellefiore.blogspot.it/2013/05/la-toeletta-delle-antiche-romane.html

Se potete, non perdetevi gli eventi della Nona Regio! Questo è solo un assaggio di ciò che vi attende! 

Nona Regio su Facebook: https://www.facebook.com/NonaRegio


Photo by Lele Photography


giovedì 11 settembre 2014

My first gothic dress!

Hello folks! Today I'd like to introduce you my latest creation, a gothic dress!
Many of you (perhaps) don't know I'm a gothic girl and this kind of fashion was my daily clothing when I was around 20. Now I dress in a more casual way but (when I can) I put on my long black skirts and tops. As model, I spent so much money in buying gothic/victorian outfits for the shootings but, actually, I don't have enough budget to do online shopping. So, after a whole year of historical inspired costumes, I decided to sew a gothic dress by my own. I'm completely obsessed in what we call "medieval gothic", a kind of gothic fashion inspired by medieval times with long dresses and huge sleeves, tiaras, capes and so on; I have many dresses in this style but they're never enough (I'm a woman!) and I think this is the model which fits me at best. 
I used the same pattern of my previous medieval dress "Igraine" (tutorial here: http://daniellefiore.blogspot.it/2014/03/medieval-dress-igraine-tutorial.html) but with some differences since now I'm more expert. I choose a simple black crushed velvet for the main dress and the remnants of the burgundy taffeta I had from the Tudor dress (some photos here: http://daniellefiore.blogspot.it/2014/08/tudor-court-dress-pt3.html). I purchased some lace and a ribbon of black organza for decorating the neckline. The main difference of this dress are the lined sleeves. This was my first attempt with lining and I have to admit it can make the difference in a gown: the sleeves are so soft and captivating, refined and look more professional. I was scared since lining seemed so difficult to my eyes but I was wrong!  If you don't use it yet start to consider it, your clothes will last longer and will be more comfortable to wear (lining is also useful to hide the inner construction of the garment, as seam allowances, stitches and other things that can make your work look poorer). For gothic dresses I suggest the classic satin/taffeta lining, black for the body and in any colour/fabric you want for the sleeves. 

 photo IMG_20140908_214843_zps6be8a125.jpg

 photo IMG_20140910_160031_zps26efa0b9.jpg

Another detail of my dress: I lost some weight since march (when I used the pattern for the first time), so it fits actually large on the back. My pattern didn't include size 8 so I've been forced to pin it on the back. I wanted to apply eyelets but I don't know if they work good on crushed velvet so let's go for two simple seams. Next time I'll use a back lacing with lace at sides and a ribbon, which looks surely better than my seams :P
As trims I went for a classic black lace at center sides and black organza on the neckline which looks so elegant. I avoided the black lace on sleeves as well but I went for a burgundy one on my arm. I didn't take many photos during the construction but I'll use the dress for a photo-shoot soon. Note: the dress has to be ironed still!

Sorry for the blurry photos but they're taken from my Instagram account. 

 photo IMG_20140910_210436_zps7e0e133d.jpg


martedì 26 agosto 2014

Tudor court dress pt.3

So ladies, after two months of work I can finally say the dress is finished! Yay! I wore it for the first time last week for a workshop and it was great! But before talking about that, let's discuss about the last part of my dress diaries. I left you with the foresleeves so it's time to afford the hardest part of the costume: the skirt! It may look strange but cartridge pleating with a light fabric is really a pain. Pleats took me a whole day of work and then I sewn the skirt to the bodice by hand, using a strong backstitch. The amount of fabric is totally crazy (8 panels!) so I decided to avoid pleats next time, even if they're surely eye-catching. Remember to wear a hoopskirt under your dress with a petticoat! Mine is black to match the sleeves.

 photo IMG_20140810_222044_zps5f744d71.jpg
The dress with corset and hoopskirt.

 photo IMG_20140810_222720_zpsca69827d.jpg
Pleats. 
 
I spent the day after hemming the skirt and the front openings, and I felt sooo exausted when I put the dress on. Then I immediately started to sew trims and decorations on the gown neckline, choosing a nice black trim and my beloved white pearls ( I use them everytime I can!).

Oh, I forgot to say I sewn with the help of my assistant a renaissance chemise with full sleeves with match foresleeves perfectly!

After that, I had to face the hardest challenge: the french hood. I found Simplicity instructions unclear and if you add I'm not good with heapieces (I like sewing but not crafting...) you can image my troubles. My french hood looks good but I'm not satisfied at all with the construction. I'll buy a better one in the future. 

 photo IMG_20140818_203305_zps21475dd8.jpg


But know don't waste other time and let's show you the photos! <3 br="">
I'm still waiting for other shots to come and they will be uploaded for sure on my Facebook page: https://www.facebook.com/daniellefiorefotomodella
I'm really pleased with the result. What do you think? I'll surely change the hood and the foresleeve with a better product as soon as possible.

Some of the photos taken at the workshop (it was an event based on Photoshop so the photos are retouched):

 photo IMG_20140822_133146_zps6c4e6655.jpg
A backstage

*Updates: January - February 2015*
Since my sewing skills improved a little I decided to sew the skirt again with better pleats. There are four big pleats on the skirt front and smaller ones on the back. Now the skirt looks more professional and it satisfies me a lot! 


To know your impressions would make me a happy woman! ;)


venerdì 8 agosto 2014

Tudor court dress pt.2

So, after working on the foresleeves I started putting together the bodice. This has been the most exciting part! The bodice has a very feminine form but (as I thought) the square neckline was too large for me. I noticed it immediately and after cutting front and back panels I shortened shoulders.  This process forced me to pleat upper sleeves a little, so my dress looks like a Tudor court gown with...puff sleeves. Yeah. *laughs*.

 photo 10526134_437075279768920_183374349323247851_n_zps60735b3b.png

Anyway, I chose as main fabric for the overdress a beautiful burgundy taffetta which looks sooo period without being too much expensive (5€ at mt more or less). I already faced this kind of fabric with a bought skirt which needed a new hem but this one is less soft and bright, so I think the skirt is made of silk taffetta, while mine is of polyester (reenactors, don't read!). I still have to iron it so don't watch the wrinkles.
The fabric, anyway, is really easy to be cut but be careful when starting to baste it: use a very thiny needle and make small stitches. This works with pins as well so pay attention when pulling them through the fabric because you may risk to torn it! Every stitch is almost visible with this fabric so be really careful and patient. I used pins to keep together skirt panels (but we'll talk about that later) and a normal basting thread for bodice and sleeves.

  photo 10556411_439510146192100_4416516258348471385_n_zpsae90c0d5.png

 photo 10245578_439539019522546_63121573837466998_n_zpsf33842ab.png

I'm totally in love with the end of the bodice. I have seen many Tudor gowns with rounded  bodice base but this pattern as a pointed base which drives me crazy everytime. I can't wait to attach the pleated skirt to see the effect!
I clean-finished the back bodice before proceeding with the sleeves and my boyfriend/tailor assistant/photographer has been so kind to apply eyelets on the back. The dress should be boned for a perfect shape and even if I decided to avoid them and wear it with a separate corset as underwear (girls, keep in mind corsets or stays are studied to stay under your clothes, not over as in the modern gothic-victorian fashion so don't think to put a corset on your Tudor gown!!), it needs eyelets. It's an important part of the dress because it gives a correct period look and no one will know if your gown is boned or not unless you won't say it. The corset gives a completely different shape to the bodice, it keeps your breast in place and gives you a better posture. I use a normal halfbust corset in burgundy velvet with steel bones.

Now let's talk about sleeves. Upper sleeves are a sort of normal t-shirt sleeves and you don't need more suggestions about them. Lower sleeves have to be discussed a little. While attaching the sleeve you have to work on the right side of fabric, because those big sleeves have to be reversed to show the lining. I didn't have enough budget to buy a contrasting lining so I chose a simple black satin which will be used for the veil as well. It's not so difficult: after sewing the sleeves take the lower edge and reverse it, attaching it to the upper sleeves. The lower hem will be the hem of the new, shining, sleeve. After this process, the upper part of your overdress is done (trims exclused, for sure).
Now, it's time to put the bodice on and attach foresleeves to the dress using ribbons. As I told before, foresleeves were tired to the main dress with ribbons sewn at the base of lower sleeve (where you reversed the sleeve, to be clear). My foresleeves still have to be finished with the inner sleeves so consider them a work in progress.


 *End of part 2*
Don't forget to follow me on Instagram for more photos! http://instagram.com/danielle.fiore

sabato 12 luglio 2014

Tudor court dress pt.1

Hello folks!
As some of you may know I'm working on a new sewing proect for some weeks: my first Tudor gown! I've always been in love with that period of English history and - of course - I love the dresses worn by women as Anne Boleyn or Jane Seymour (the style under Elizabeth I is quite different and is known as "Elizabethian"). I was planning to sew a dress like that from last year but I didn't feel good enough to start it and so I postponed this shopping. After a year I felt ready and I bought the famous pattern by Simplicity (and I've been lucky because it has been announced discontinued in March 2014!). While I was waiting for it I started to do a little bit of historical research about the real Tudor dresses and I discovered something really interesting: Tudor women wore skirts with a long train and a hoopskirt (the variation of the spanish farthingale brought in Englad by Catherine of Aragon) and - this was really surprising! - without pleats. If you look at period paintings you'll notice there are almost no pleats on their skirts so this is a big difference if compared to the pattern which requires cartridge pleating (cartridge pleating is when small pleats have to be stitched on a very thiny bodice - it's a long process to be done by hand exclusively).

I didn't have enough money to buy the huge amount of fabric for the overdress (8 metres!!) and so I started working on the underskirt and the foresleeves. Tudor ladies wore a multi layered outfit, from the white underdress to the final overdress, which was rich and extremely decorated for the court ladies; it's really important to wear the right undergarments with this kind of costume, so don't forget your chemise, your corset, your hoopskirt and at least one underskirt. I'll wear a black pleated satin skirt over my hoopskirt which won't be visibile once the dress will be finished: the central panel has to be worn as a small apron tied on your waist by a band and this fabric has often to match with the foresleeves.

What are foresleeves? This is the most difficoult step I met during my research. Finding a good tutorial about them has been really hard. Foresleeves are a sort of fake sleeves, often rich and decorated with pearls or buttons, which were tied to the main sleeves and could be changed when women wanted to. This is supposed to be due to the hot weather during summer or to simple fashionable reasons. Women could change their sleeves when they want and they can have several pairs. Don't be afraid when you'll look at pattern instructions: foresleeves HAVE to be big! The best result will be achieved with a lot of white lining pulled through the side and central openings, like in italian renaissance period dresses.
So I started working on the foresleeves and I've been immediately surprised by their size. They're really big and wide, I think I'll made them a little bit smaller in the next costumes because I feel them quite uncomfortable. After cutting the pattern and the fabric I cut the central stashes and I decided to trim them with some burgundy crushed velvet I had at home. It's not period at all but making an historical accurate garment is not my actual aim. Only this process took me a week only, I didn't have enough time and stashes have been really hard to be stitched.


Tudor photo IMG_20140623_143705_zpse1463576.png 

Now I can say I've a new friend:  bias tape. I never used it before and I was really surprised by the price (0.30€ at metre! Lovely!) and the huge amount of things you can do with it. It's surely better than the classic satin ribbons which can be ugly to see on the corners. Bias tape is perfect for trimming raw edges and corners, try it and you'll love it! You just have to take a moment to understand how to sew it: there are fast and simple techniques but a little training may be required. After learning how to sew it I trimmed the edges of my foresleeves and then started to search for a lining. Ok, I know. Lining should be stitched before the trim, but at first I didn't want it. Then I remembered to have some white cotton at home and I was pleased to discover it was enough for my lining. Unfortunately it doesn't come out from the stashes as I wanted/expected so I've learned something new for the future: cut your lining bigger than your sleeve, otherwhise your fabric won't be fluffy. Shame on me. I love how they turned out, the white lining gave a completely different look to my foresleeves! Then I sewed some ornamental buttons to keep sides closed and I LOVE, totally LOVE how they came out.

Tudor photo IMG_20140701_233420_zps44f2eb7f.png
The easiest way to stitch bias tape.


Tudor photo IMG_20140710_173855_zps7f833ad1.png
The pinned lining.


Tudor photo IMG_20140710_215658_zpsbb71b1b8.png


 photo IMG_20140710_215705_zpsa9edce25.png
Finished foresleeve.


Now the final touch: the ribbons. Foresleeves were tied with ribbons inside the dress to the main sleeve (the upper one) and so explains the rigid posture of Tudor court ladies.
Actually I'm waiting for my fabrics to come so I cannot explain you how to finish your overdress. I hope you've found this part interesting enough and feel free to contact me for any question!

sabato 28 giugno 2014

Edwardian dress diaries

Hello folks! Finally I have some spare time to write a new entry!
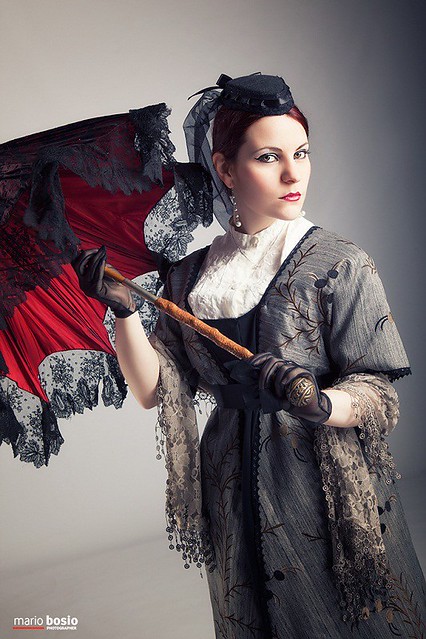
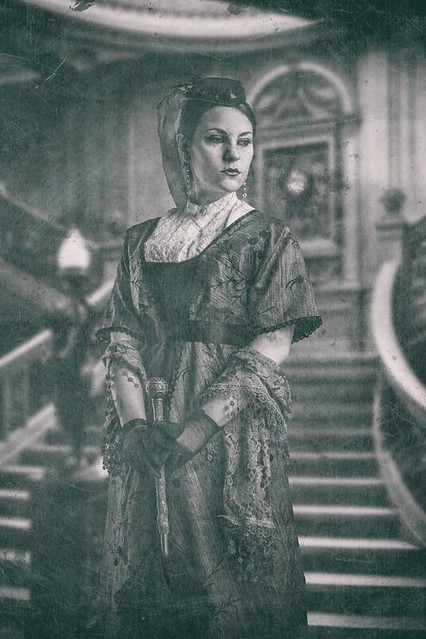
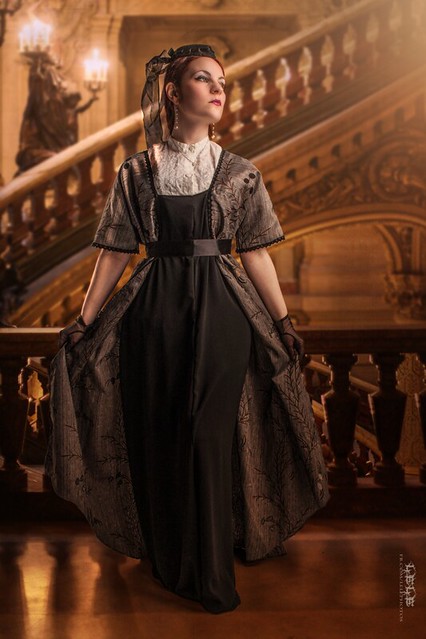
Some weeks ago we had a lovely sunny day here in Italy and after taking some classical shots I could come back home to wear my Edwardian outfit! I started to sew a year ago and this is my second Edwardian inspired ensemble. I know it's not 100% accurate (as my other costumes) but I don't have advanced skills and my budget is quite small. I used Simplicity pattern n.8399 as the previous Edwardian/Titanic era costume I sewed (full tutorial here: http://daniellefiore.blogspot.it/2014/05/titanic-downton-abbey-inspired-dress.html) but with some differences: I decided to avoid the open overdress as in the previous one since it looked too much Regency at my eyes due to the huge back (it needs lot of pleats). With this one I did pleats on the back trying to make it more fitting, but I think it's still too large on the hips. 


The fabric is soft grey striped satin cotton with a black satin ribbon laced on the backunder the bust. The lace is the part I love at most: I found it at the local market at a very cheap price! I simply love how it falls on the arms. I know the hat is not Edwardian but I still have to find one. As jewels I wore a pearl parure without rings or bracelets. They cannot be visible but I was wearing a pair of black leather boots (for a good pair of Edwardian shoes check American Duchess out, her creations are awesome!). And now the parasol: it's a truly vintage piece from 50 years ago and it completes the look perfectly with all that white lace.


I didn't take so much photos during the construction - I'm so sorry - but it's the same of the previous costume. I uploaded some photos on my Instagram account, anyway: 


The fabric is really soft and smooth, a pleasure to work with! The only problem is it need lot of ironing before being worn.
Other shots from the day: 


I really enjoyed the walk with the costume, I wore it during an historical fair as well and some people asked me where they could find a dress like this :3 I was pleased because they were all surprised I'm a beginner costumer and seamstress *pride&joy*
I'm planning to sew other Edwardian costumes in the future, I'm in love with the swimdress worn by Kate Winslet in Titanic so who knows...maybe I'll try to reproduce that one.

All my costumes can be purchased on my Etsy shop: http://www.etsy.com/shop/ilfiorenero
I hope you'll have some minutes to visit it!

*Updates September 2015*
I stitched again this dress, giving it a more elegant shape. The skirt has been hemmed in a better way and I added a black trim at the bottom. Every seam has been serged (no lining due to lack of budget). The lace has been sewn completely by hand.
The costume is listed on my Etsy shop and it's ready to be shipped! :)


giovedì 22 maggio 2014

Caterina d'Aragona

Nota ai più per le vicissitudini sentimentali del marito, Enrico VIII Tudor, Caterina d'Aragona merita una posizione di prestigio in quelli che furono gli albori della moderna storia europea, sebbene molti trascurino il ruolo da lei ricoperto. 
Caterina d'Aragona apparteneva ad un nobilissimo ramo delle dinastie europee, essendo figlia dei noti Isabella di Castiglia e Ferdinando d'Aragona, i cosiddetti "Re Cattolici". Isabella e Ferdinando riuscirono ad unificare la Spagna sotto la bandiera cristiana dopo otto secoli di occupazione araba, conquistando Granada nel 1492 (la famosa Reconquista) e prendendo le redini di una nazione che, lentamente, si affacciava al declino. La Spagna dove Caterina nacque era un paese ormai indebitato e indebolito dalle frequenti lotte intestine, un paese impoverito e minacciato dalla crescente egemonia francese. L'Inghilterra rappresentava un enorme pericolo e bisognava trovare un'alleanza al più presto. 

Caterina nacque in un clima di tensione, crebbe spostandosi da un accampamento all'altro, il che segnò per sempre il suo carattere: molto religiosa e fervente cattolica, fu una donna estremamente volitiva e tenace, aggrappandosi per tutta la vita al ruolo che la vita le aveva destinato, essere regina d'Inghilterra. Si dice fosse molto bella, con gli occhi celesti e i capelli ramati. 
Nata nel 1485, a tre anni fu fidanzata all'erede dell'allora nascente dinastia Tudor, Arturo, primo figlio del re Enrico VII. Caterina nacque per essere regina, fu cresciuta ed educata per essere principessa del Galles e regina d'Inghilterra, e non se lo dimenticò mai; Caterina rivendicò sempre le sue nobilissime origini contro quelle oscure dei Tudor (Enrico VII non fu re per eredità ma per aver rivendicato la corona con le armi, sposando poi una York - Elisabetta - e ponendo così fine alla centenaria guerra delle Due Rose), e spesso dimostrò disapprovazione per i rozzi modi di fare inglesi.
La fanciulla aveva ascendenze inglesi da parte materna e fu ritenuta sin da subito un ottimo partito per il giovane Arturo, sebbene lei avesse ben più sangue reale di lui (proprio come la coppia reale inglese). Il matrimonio non fu molto felice: Arturo morì appena cinque mesi dopo per un'infezione e senza essere riuscito a generare un erede. In un mondo dove alle principesse reali erano richiesti parti frequenti per assicurare la successione, Caterina dovette usare al meglio le proprie armi per restare al dov'era: era vedova, senza dote, senza figli, sola in un paese straniero. Sostenne per tutta la vita di non aver consumato il matrimonio con Arturo e si aggrappò a questa flebile affermazione per farsi promettere in moglie al fratello di Arturo, Enrico. I due si toglievano sei anni e dalla morte di Arturo al loro matrimonio ne trascorsero quasi sette. Caterina visse in uno stato di semi prigionia fino al giorno del secondo matrimonio, faticando a mantenersi e dovendo vendere il proprio vasellame per sopravvivere. Aveva 23 anni quando si sposò con Enrico. La verità a proposito delle nozze con Arturo non sarà mai chiarita: Caterina non smentì mai la propria versione, forse per paura che il suo matrimonio con Enrico venisse annullato. Resta che con Enrico restò subito incinta, ed ebbe ben sei gravidanze, ma molte si conclusero con aborti o morti premature. 

Caterina fu comunque molto attiva dal punto di vista religioso e politico, assumendo la reggenza e dimostrando al popolo inglese che una donna poteva tranquillamente governare una nazione, sebbene ciò fosse visto come qualcosa di immondo e inconcepibile. Anticipò, insomma, le mosse della futura Elisabetta I. Da brava cristiana fu una donna molto caritatevole nei confronti dei poveri e dei deboli, divenne la prima donna ambasciatrice in Europa. Fu una donna estremamente colta, parlava correttamente francese, latino e greco, eccelleva nelle arti e danzava con maestria. Enrico VIII ne aveva molto rispetto ma soffriva per la mancanza di un erede maschio. Iniziò presto a stufarsi di lei ed a concentrare le proprie attenzioni verso le cortigiane, prima tra tutte Anna Bolena. Nel 1525, Enrico dichiarò di voler sposare Anna. Caterina - ricordiamo - era più vecchia di lui, si dice fosse anche appesantita, e ormai si avviava alla menopausa. Concepire un erede con Enrico era sempre più difficoltoso. Enrico tuttavia sapeva che non poteva sciogliere facilmente il matrimonio, e andò cercando una soluzione: la trovò nel Levitico, nel passo dove afferma che sposare la moglie del fratello è un peccato mortale. Enrico trovò qui la causa dei suoi problemi di successione, sposandosi avevano peccato ed erano stati maledetti. La questione fu lunga e dibattuta, il papa non voleva saperne di sciogliere le nozze e ciò portò ad un clima di estrema tensione tra Roma e Londra. Enrico fu scomunicato, si staccò da Roma ponendosi a capo della Chiesa d'Inghilterra, ma dopo cinque anni riuscì a sposare la sua prediletta. Caterina tuttavia non si perse d'animo. Lasciò la corte ma non smise mai di definirsi l'ufficiale e sola regina d'Inghilterra, ritenendo del tutto privo di valore il matrimonio tra Enrico e Anna, e con lei c'era il popolo. Morì di cancro nel 1536, lasciando la figlia Maria I al proprio destino.

lunedì 5 maggio 2014

Titanic - Downton Abbey inspired dress tutorial

Hello guys! After some days of heavy rain and storm we have sun, spring, hot weather and ice creams, lol!
Today I'd like to talk you about my first Titanic - Downton Abbey - Edwardian inspired dress using Simplicity pattern 8399. I've always been in love with the dresses worn by Kate Winslet in Titanic (1997), and since I was a child I dreamt to wear an Edwardian costume. The pattern is not 100% accurate but it creates a nice look, though it needs some adjustments. First of all, the shape of dress is too large to be a perfect Edwardian dress and it looks more like a Regency costume, so I suggest you to choose a tight fitting. The back closes with a zip so if you're looking for  a good historical pattern,  this is not the one for you (you can always change the zip with some buttons). The pattern includes two dresses inspired by the movie Titanic, the swimdress and the jumpdress; for my costume I used the swimdress pattern (model A) which is more "daily" and simple. The original dress is made of several layers of chiffon but for mine I used two fabrics only, overdress and skirt. I'm planning to sew a good replica of the swimdress in the future, but for the moment I need to improve my skills. 

 photo DSCF0380_zps5338d46a.jpg


The fabric I used it grey silk with a georgette black skirt, the ribbon is of black satin. I used a normal white blouse I had in my wardrobe as bodice. As underwear, I wore a longline corset to recreate the Edwardian silhouette a little. The gloves are true vintage gloves from my grandma while the hat comes from a flea market for a couple of euros! I know the hat is not Edwardian but I don't have another one heheh *blushes* 

So, for this model you'll need:
- Pattern (of curse)
- Fabric
- Lace/trims
- A blouse/white bodice
- Satin ribbon
- Many accessories as gloves, hats, jewels

My fabric was a gift so I've been very lucky, and I had to buy the skirt only. I started cutting the two pieces of the over dress and I noticed immediately it was really large to fit the Edwardian shape (so avoid the piece 6A included in the pattern); the overdress bodice has been really fast to cut and sew because the sleeve is included in the main piece. I attached it to the overdress skirt easily and then I've been forced to accept the challenge with the remaining fabric of the skirt back: I did some pince inside the dress to hide the excessive fabric but next time I'll do a tighter cut. 

 photo DSCF0381_zpsd2607484.jpg


 photo DSCF0387_zpsf6312d9a.jpg


 photo DSCF0384_zpsb6637d88.jpg


 photo DSCF0385_zps5b3e1130.jpg

After sewing the skirt I basted it to the overdress and put the dress on with the white blouse. Then I sewed the pieces with the sewing machine and added two carriers for the ribbon on the back. The final touch has been the black lace all around the sleeves and the overdress hems, and this part took me a while to be completed since I proceeded pinning the lace to the fabric and sewing it step by step with the machine.

 photo DSCF0388_zpsf6a5acab.jpg
The basted dress on

That's the finished dress on during a shooting:

Edwardian Times

Dinner on the Titanic

Edwardian Dress 1912

sabato 3 maggio 2014

Recensione: "L'amante di Pilato" di Gisbert Haefs

Il libro di Haefs ci riporta, come il titolo suggerisce, ai tempi dell'occupazione romana della Giudea. Durante i giorni che portano alla crocifissione di Gesù (chiamato correttamente Geoshua), Gilbert Haefs narra con un'accurata ricostruzione storica le vicende della principessa egizia Cleopatra e delle sue ancelle, in una repentina fuga attraverso l'Oriente in un susseguirsi di carovane, predoni, assalti, morti, assassini misteriosi, traditori e amicizie. Come in un vero libro giallo, niente in questo romanzo è scontato: i personaggi rivelano oscuri dettagli a proposito del proprio passato e dei motivi che li conducono in Palestina, prima tra tutti l'enigmatica Cleopatra e il centurione Rufo, che fino all'ultimo manterrà celati i suoi intendi pro o contro gli stessi romani. Pilato appare troppo occupato ad imporre il controllo romano in una zona travagliata dai litigi civili tra ortodossi e non ortodossi, e poco si cura della sua vecchia amante egizia.
In tutto questo l'esecuzione di Gesù è poco più di un contorno, una scena fugace cui si fa riferimento per un paio di righe, sebbene la sua figura sia più volte dipinta come giusta e onesta, in contrasto ai giudei ortodossi che non pochi problemi crearono agli occupanti romani. Il fulcro del libro è la battaglia di Ao Hidis, una fortezza ostile ai romani in territorio romano, dove la vicenda si snoderà rivelando alcuni particolari prima celati.
La pecca del libro è lo stile narrativo spesso frammentario e i dialoghi poco chiari, uno stile in cui non ci si può perdere alcun dettaglio se non si vuole arrivare impreparati al finale.


Voto: 7/10

Post in evidenza

Edwardian skirt and blouse, circa 1900-1905

I've always been fascinated by the style of early Edwardian era, with those lightweight blouses, fabrics, delicate laces and floating s...