Let's go with the second part of this project. To be honest the outfit has been finished and already worn but, as usual, I'm always late with the blog :(
So, after finishing the skirt and hand sewing the trim all around the hem I started to work on the blouse. It was essentially draped on the dress form to fit since my pattern was incredibly short waisted, probably designed to be sewn to the skirt. I suppose this was called for a theatrical use.
This process took a while but it was worthy.
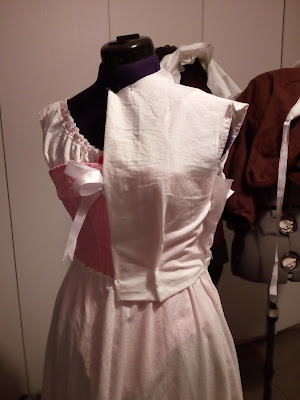

The upper part of the neckline is gathered to fit.


The pattern didn't have any tips for fastening so after looking to some extant pieces I went for back fastening with fabric covered buttons.


The hem of the blouse is bounded with black cotton bias tape and the seams are gently boned to keep it in place when worn.
Now the sleeves. I didn't want exaggerate sleeves in my blouse and luckily, the ones in my pattern weren't so big! I just did some basic alterations to fit my arms and they were ready! They're flat lined in cotton as the rest of the blouse; for a more puffy look I should have added some padding (maybe organza ruffles?) between the lining and the fashion fabric but I'm happy with the result.
And that's all! The making of the skirt and the blouse took about a week: I'm losing weight and I needed to shorten the waistband of the skirt, which took me a while (rip it off, measure again, shorten it, make the back pleats again, baste the whole stuff together, try it on, remove hooks and eyes on the left side and sew again). The collar turned out too big but this can be easily fixed in a second moment.
It was a very simple and fast project, not bad to be my first jump into the 90s! I also purchased a pattern for an accurate hat.


Nessun commento:
Posta un commento